
You are using an out of date browser. It may not display this or other websites correctly.
You should upgrade or use an alternative browser.
You should upgrade or use an alternative browser.
Clarence the Safari Camperbus
- Thread starter wildebus
- Start date
wildebus
Full Member
- Posts
- 12,214
- Likes
- 17,815
ThanksExcellent work and I do like your ideas, I would love to see it in the flesh when it is finished
")
First "shakedown" weekend away starting tomorrow so will see how the plans work out! No curtains yet so will be hanging sheets from netcord as a temporary measure but apart from that looking reasonable inside :dog:
955itriple
Full Member
- Posts
- 50
- Likes
- 82
Love what you've done with this "bus". Work of art.
wildebus
Full Member
- Posts
- 12,214
- Likes
- 17,815
First Weekend away in Clarence!
So Clarence was not fully ready (ripped up old duvet strung up for curtains for example) but regardless, we were booked for a VW Festival for the weekend so went ready or not!
About a 2 hour drive to the Show, and once there was field camping with no facilities other than Portoloos (I prefer to use my own Chemical Toilet anyway to be honest at these Festivals, so public portoloos or not makes no difference).
POWER
Now Clarence is fully-electric in terms of cooking and fridge, so only energy source is Battery as off-grid. This is the situation I designed Clarence for, so how did we do?
Batteries at 100% at 2PM on Friday; then plugged in the slow cooker with a prepared meal cooking away. This was running until around 8PM on the Friday until we ate the meal with some hob-fried potatoes, cooked on the 2kW Induction Hob. This was the only meal we cooked in fact, with a takeaway the next night and cold food during the day, but hob was on quite a few times for cups of tea of course.
Did do some final touches to the galley kitchen with the door and drawer handles fitted and switch for the tap water pump.
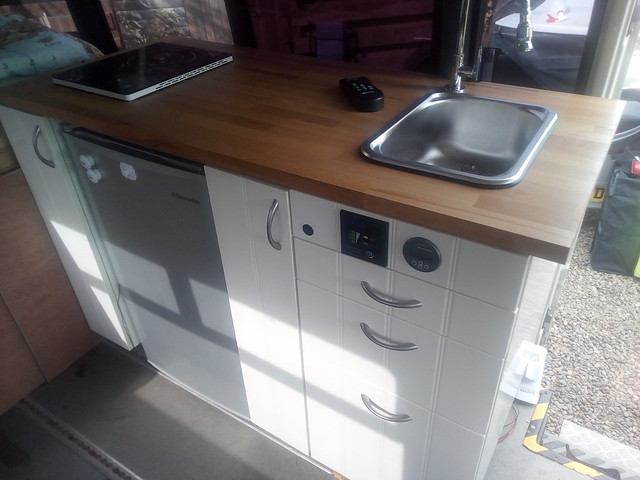 IMG_20180525_092136 by David, on Flickr
To stop the doors and drawers opening on the move, used a couple of handy but low-cost solutions:
I have used the push-to-lock door knobs in the past, but they are very expensive for what they are IMO. This time I bought these - Cupboard Child Locks, Adoric Child Safety Locks Magnetic 6 Locks+2 Keys Adhesive Baby Drawer Locks No Drilling: Amazon.co.uk: Baby
https://images-na.ssl-images-amazon.com/images/I/71rKuYyJexL._SL1500_.jpg
I like these as they are invisible in use and when you are parked up, you can set them to unlocked which is very handy.
The other lock I use on the Fridge is a strap that clips on and stops the door opening (I have no lock on mine as it is a domestic model).
Apart from the Hob (and 2500W Inverter), other power usage is the AC Fridge of course with the small Victron Inverter on, the Network Router and Booster, Alexa Echo, Fan and lights, Water pump, plus some device charging and Laptop and Printer use. Current Draw while cooking and fan on, fridge maybe on, etc. peaked (or should be troughed?) at 175A Draw .
By the time we got home Sunday Evening at 8PM - so 2.5 Days away door to door we were at 93.9% SOC - so not bad really, especially considering Saturdays cloud.
The weather was not great all the time with lots of cloud as mentioned but there were some bright times on Saturday and Sunday was nicer.
Peak Solar was just before 2PM on Saturday when we hit 341W (on the 400W array) with 25A going into the battery.
SPACE
I've done these shows for a few years and gradually been upsizing from a VW T4, to T4 with Trailer to T5 LWB and Trailer to T5 LWB and bigger Trailer until now at the VW LT LWB (aka Sprinter). Decided to see if we could loose the Trailer this time and fit everything inside!
We just (only just, mind) managed it ...
Garage TOTALLY full
 IMG_20180525_115458 by David, on Flickr
Living area pretty chocka as well
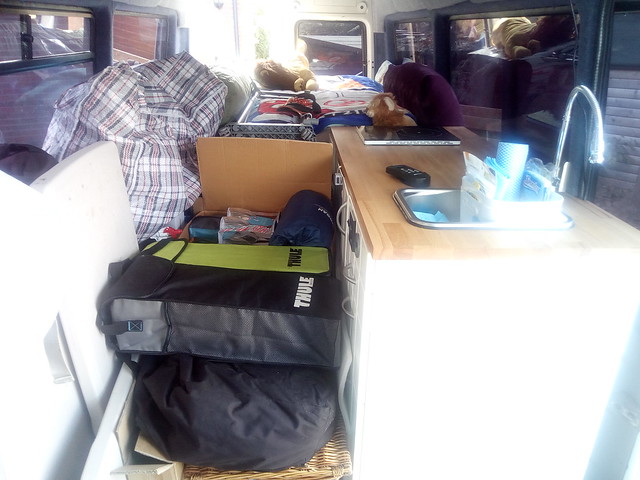 IMG_20180525_115424 by David, on Flickr
If the show involved overnighting in transit, have to use the Trailer again I reckon.
CONVERSION
This weekend was a good test of how well I liked the new conversion, having now been to the exact same show multiple times in three different (self-build) campervans ...
The ability to stand up inside (T4 and T5 were low roof) was fantastic! I would not want to go back to a low roof camper again.
The Fixed bed was also fantastic! Super-comfortable having a standard double bed with an IKEA Mattress, plus feather topper. Apparently there were fireworks on Saturday night but I never heard a thing! Out like a light
Full Size Fridge was brilliant. Ability to have 2L bottles of water and a Wine Bottle standing up in the lowest door shelf, plus cans in the shelves above and room for loads of food (we brought most back as usual) was great.
General walking around space is much better as well. The T4 and T5 were ok as 1 person campers, but still cramped.
Overall conclusion ... the LT is not as nice a drive as either the T5 or T4 but as a Camper is way superior.
OUR PITCH
As our campers have changed, so has our outdoor space setup.
On the T4 we had a Kyham Sun Canopy plus the optional sides.
On the T5 we upgraded significantly to a Kyham Motordome Sleeper. This gave loads of space but did take a fair bit of time to setup (the videos with 3 Minute setup you can see is just to get the basic frame up - pegging out, etc. takes time).
On the LT, I have a Fiamma Caravanstore on an awning rail and I bought the Fiamma "Privacy Room CS Lite" to go onto it.
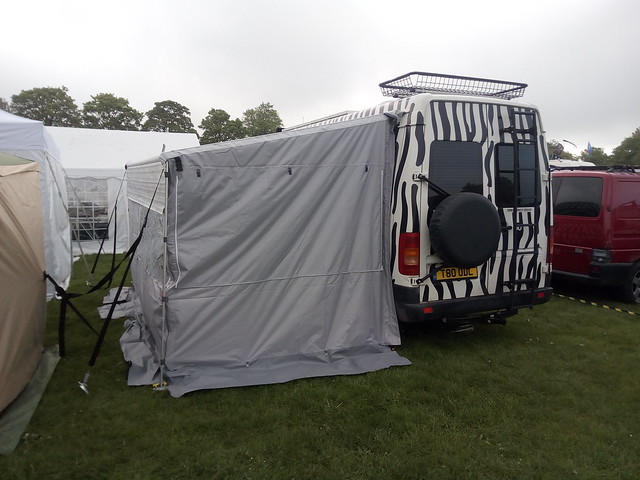 IMG_20180526_074144 by David, on Flickr
First time deployment (or even out the bag!) was on Friday night and found the Fast Clip arms were anything but fast as they were too long! one I managed to clip on after 10 minutes; the other I sliced around 5mm off with my Dremel and still too long but managed it just. One end is spring loaded to take up the tension, but when used with my setup the spring is fully compressed and still too long, so I have a fair bit to play with in terms of trimming and still keep the tension there.
Once the arms were in place, the actual awning sides went up very easily and quickly and I am pleasantly pleased with the speed, and especially the ease of tear-down (except the arms - THIS TIME ONLY!!) and packing away.
For those who don't "DO" awnings, each to their own I reckon. Depends on the location I guess? In front of the Privacy Room is a Quest Screenhouse 6 3M x 3M Gazaboo and next to that is a 4.5M x 3M Heavy Duty Gazeboo which I also have to put up, so when it comes to our own Gazebo/Awning I want a quick one!
Still got stuff to do to finish (especially around the bathroom facilities area) but overall looking good
So Clarence was not fully ready (ripped up old duvet strung up for curtains for example) but regardless, we were booked for a VW Festival for the weekend so went ready or not!
About a 2 hour drive to the Show, and once there was field camping with no facilities other than Portoloos (I prefer to use my own Chemical Toilet anyway to be honest at these Festivals, so public portoloos or not makes no difference).
POWER
Now Clarence is fully-electric in terms of cooking and fridge, so only energy source is Battery as off-grid. This is the situation I designed Clarence for, so how did we do?
Batteries at 100% at 2PM on Friday; then plugged in the slow cooker with a prepared meal cooking away. This was running until around 8PM on the Friday until we ate the meal with some hob-fried potatoes, cooked on the 2kW Induction Hob. This was the only meal we cooked in fact, with a takeaway the next night and cold food during the day, but hob was on quite a few times for cups of tea of course
.Did do some final touches to the galley kitchen with the door and drawer handles fitted and switch for the tap water pump.
IMG_20180525_092136 by David, on FlickrTo stop the doors and drawers opening on the move, used a couple of handy but low-cost solutions:
I have used the push-to-lock door knobs in the past, but they are very expensive for what they are IMO. This time I bought these - Cupboard Child Locks, Adoric Child Safety Locks Magnetic 6 Locks+2 Keys Adhesive Baby Drawer Locks No Drilling: Amazon.co.uk: Baby
https://images-na.ssl-images-amazon.com/images/I/71rKuYyJexL._SL1500_.jpg
I like these as they are invisible in use and when you are parked up, you can set them to unlocked which is very handy.
The other lock I use on the Fridge is a strap that clips on and stops the door opening (I have no lock on mine as it is a domestic model).
Apart from the Hob (and 2500W Inverter), other power usage is the AC Fridge of course with the small Victron Inverter on, the Network Router and Booster, Alexa Echo, Fan and lights, Water pump, plus some device charging and Laptop and Printer use. Current Draw while cooking and fan on, fridge maybe on, etc. peaked (or should be troughed?) at 175A Draw .
By the time we got home Sunday Evening at 8PM - so 2.5 Days away door to door we were at 93.9% SOC - so not bad really, especially considering Saturdays cloud.
The weather was not great all the time with lots of cloud as mentioned but there were some bright times on Saturday and Sunday was nicer.
Peak Solar was just before 2PM on Saturday when we hit 341W (on the 400W array) with 25A going into the battery.
SPACE
I've done these shows for a few years and gradually been upsizing from a VW T4, to T4 with Trailer to T5 LWB and Trailer to T5 LWB and bigger Trailer until now at the VW LT LWB (aka Sprinter). Decided to see if we could loose the Trailer this time and fit everything inside!
We just (only just, mind) managed it ...
Garage TOTALLY full
IMG_20180525_115458 by David, on FlickrLiving area pretty chocka as well
IMG_20180525_115424 by David, on FlickrIf the show involved overnighting in transit, have to use the Trailer again I reckon.
CONVERSION
This weekend was a good test of how well I liked the new conversion, having now been to the exact same show multiple times in three different (self-build) campervans ...
The ability to stand up inside (T4 and T5 were low roof) was fantastic! I would not want to go back to a low roof camper again.
The Fixed bed was also fantastic! Super-comfortable having a standard double bed with an IKEA Mattress, plus feather topper. Apparently there were fireworks on Saturday night but I never heard a thing! Out like a light
Full Size Fridge was brilliant. Ability to have 2L bottles of water and a Wine Bottle standing up in the lowest door shelf, plus cans in the shelves above and room for loads of food (we brought most back as usual) was great.
General walking around space is much better as well. The T4 and T5 were ok as 1 person campers, but still cramped.
Overall conclusion ... the LT is not as nice a drive as either the T5 or T4 but as a Camper is way superior.
OUR PITCH
As our campers have changed, so has our outdoor space setup.
On the T4 we had a Kyham Sun Canopy plus the optional sides.
On the T5 we upgraded significantly to a Kyham Motordome Sleeper. This gave loads of space but did take a fair bit of time to setup (the videos with 3 Minute setup you can see is just to get the basic frame up - pegging out, etc. takes time).
On the LT, I have a Fiamma Caravanstore on an awning rail and I bought the Fiamma "Privacy Room CS Lite" to go onto it.
IMG_20180526_074144 by David, on FlickrFirst time deployment (or even out the bag!) was on Friday night and found the Fast Clip arms were anything but fast as they were too long! one I managed to clip on after 10 minutes; the other I sliced around 5mm off with my Dremel and still too long but managed it just. One end is spring loaded to take up the tension, but when used with my setup the spring is fully compressed and still too long, so I have a fair bit to play with in terms of trimming and still keep the tension there.
Once the arms were in place, the actual awning sides went up very easily and quickly and I am pleasantly pleased with the speed, and especially the ease of tear-down (except the arms - THIS TIME ONLY!!) and packing away.
For those who don't "DO" awnings, each to their own I reckon. Depends on the location I guess? In front of the Privacy Room is a Quest Screenhouse 6 3M x 3M Gazaboo and next to that is a 4.5M x 3M Heavy Duty Gazeboo which I also have to put up, so when it comes to our own Gazebo/Awning I want a quick one!
Still got stuff to do to finish (especially around the bathroom facilities area) but overall looking good
wildebus
Full Member
- Posts
- 12,214
- Likes
- 17,815
So I've made the changes to the Awning arms (sliced off about 12mm I think) and they now go on and off pretty simply.
As mentioned elsewhere, swapped out the temporary water containers to my final 2x25L carriers in their dedicated area under the bed
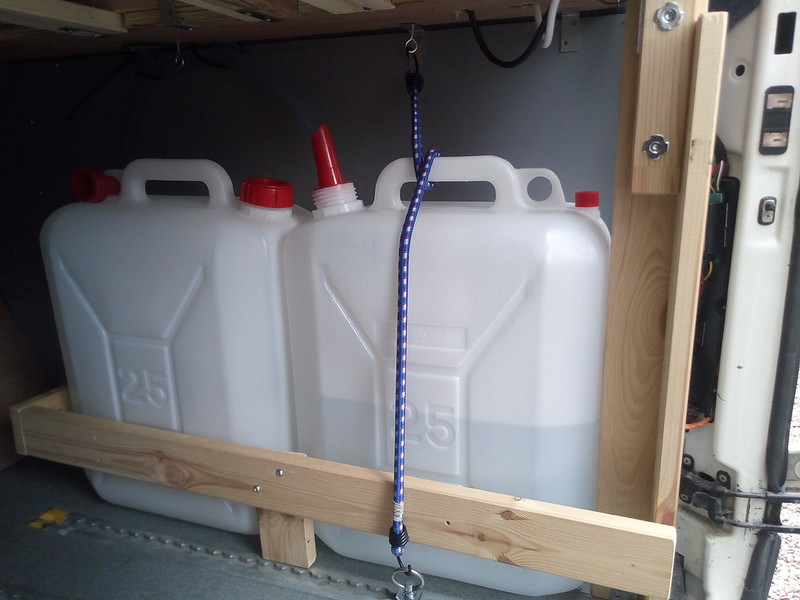
Water Supply by David, on Flickr
I've added some devices to the control board in the kitchen

Control Panel by David, on Flickr
I've added the Thermostatic Controller for the Fridge Fan (this is an extra 12V 4" fan I've fitted pointing at the Compressor. I have not yet confirmed the best temp to set it to activate on. Highest temp I have noticed is around 37C, with a typical temp of around 20C.
On the right hand side is a combined set for water pump and lights.
The pump switch is wired up for the Shurflo pumo;
The 'Light' switch right now is controlling the Split-Charge VSR so I can turn it off easily. This is a temporary thing and not sure if I need to do this or not longer term. My end-plan is to have this switch for the Electric Water Heater but I might make a little multi-switch panel instead to have Pump, Heater, VSR enable and Lights on a small group together.
Talking electrics, instead of the basic D+ Controlled 200A Relay, I fitted a 140A VSR instead. Only did so yesterday but working out pretty good
I reused the taillift 16mm cable which saved the job of routing a cable out the engine bay which was good. However this is protected by a 70A resettable breaker which is probably a bit small for full alternator charging of the Leisure Battery bank. Will leave it and see what happens and if necessary replace with a bigger fuse.
The VSR is working very well in terms of having the Solar charge the Starter Battery as well. I installed yesterday and had it working at around 5PM. This morning by 11:45AM both the Starter Battery and Leisure Battery Bank were fully charged and the Solar Controller in Float mode despite the Starter needing a fair charge and the Compressor Fridge and Inverter being on 24/7.
Last major change yesterday was to the AC Electrics.
Changing my layout meant revising the socket positioning. I have a relatively complicated 230V AC setup with 4 distinct circuits, but it is not complexity just for the hell of it. It works like this:
Circuit #1: 230V via Victron 12/500 Inverter.
This is on 24/7 and powers the AC Fridge, Internet Router and Booster, plus sockets to the 'dinette' area and bedside shelves for "always on" power availability
Then there is a consumer unit with another 3 circuits (each protected by its own DP MCB and with an RCD for the incoming supply.
Circuit #2: 230V automatically switching between 2500W Inverter and 10A Mains EHU.
This circuit is used primarily for the kitchen, with a dedicated socket for the 2000W Induction Hob and another socket available for portable applicances used on the worktop (e.g. a Slow Cooker or George Foreman Grill), plus an external 'commando' socket for outdoor use (power tools, outdoor lighting, etc).
This circuit has a contactor relay that detects the presence of a live EHU and switches to that output automatically, which means I don't have to have multiple sockets for cooking and can use the best power source available.
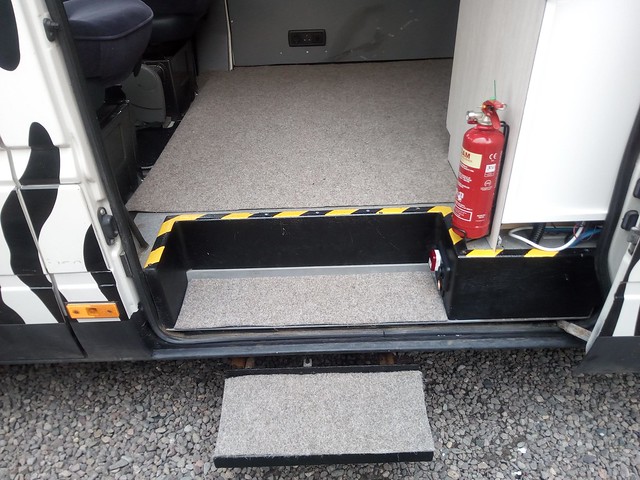
Circuit #3: 10A 230V EHU Only.
This circuit only has a single outlet located by the step
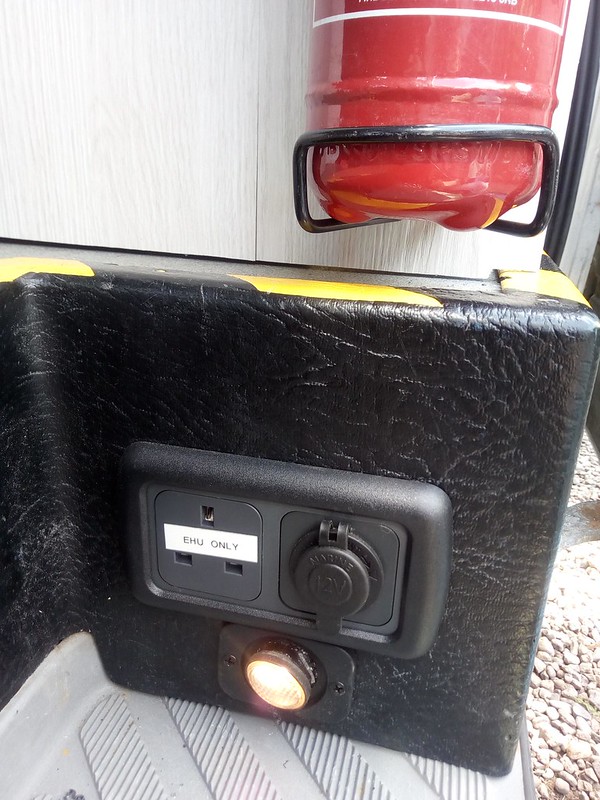
Step Socket by David, on Flickr
The primary purpose of this socket is for an electric heater if hooked up. I didn't want to use an EHU/Inverter switched socket for this in case the hookup tripped and I ended up drawing a massive amount of power off the battery bank via the inverter without realising.
Circuit #4: 6A 230V EHU Only.
This is dedicated to the Mains Charger and has just the single outlet close by it.
Now I have actually got one further socket for Circuit #2 in fact, located next to the Mains Charger socket
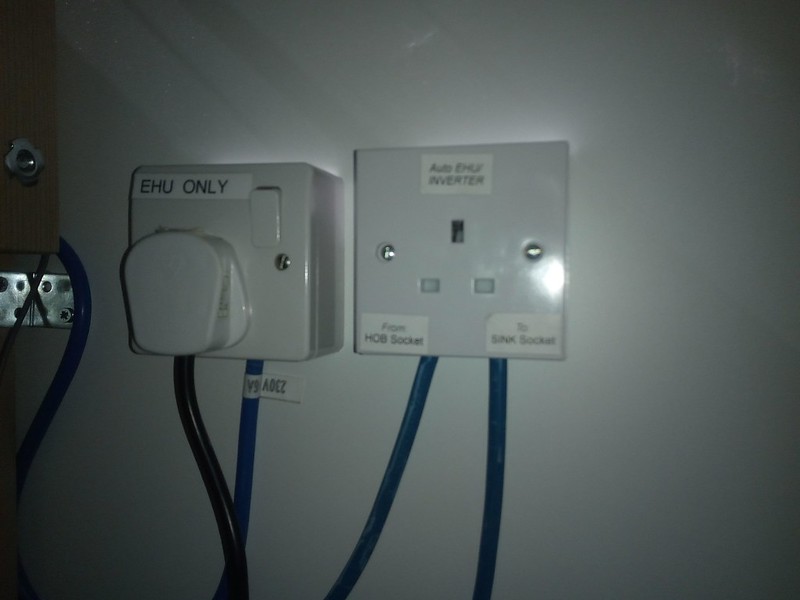
Sockets by David, on Flickr
The reason for this is should there be a problem with the Victron Inverter, I can move the plug from that inverter onto the Inverter/EHU circuit and use that inverter; or I could change say the Dinette AC socket to be powered from the big inverter instead for a while should I be doing something inside the van that demanded more power.
It looks a bit messy as need to clip up the cables still and fix the door slide bits, but the various sockets for Circuit #1 go into an extension block, protected by a 5A fuse (we are talking very low power devices here) and I can move any plug from this block to the spare socket opposite it.
I don't think I will need to do so, but a bit of extra installation now saves the potential hassles later on")
So that pretty well covers the electrics EXCEPT for above your head! not yet installed the final lighting and using the courtesy lights still (reworked to use the Leisure Battery instead of Starter).
And still for other bits and pieces as well of course. Some minor and some more significant
As mentioned elsewhere, swapped out the temporary water containers to my final 2x25L carriers in their dedicated area under the bed
Water Supply by David, on Flickr
I've added some devices to the control board in the kitchen
Control Panel by David, on Flickr
I've added the Thermostatic Controller for the Fridge Fan (this is an extra 12V 4" fan I've fitted pointing at the Compressor. I have not yet confirmed the best temp to set it to activate on. Highest temp I have noticed is around 37C, with a typical temp of around 20C.
On the right hand side is a combined set for water pump and lights.
The pump switch is wired up for the Shurflo pumo;
The 'Light' switch right now is controlling the Split-Charge VSR so I can turn it off easily. This is a temporary thing and not sure if I need to do this or not longer term. My end-plan is to have this switch for the Electric Water Heater but I might make a little multi-switch panel instead to have Pump, Heater, VSR enable and Lights on a small group together.
Talking electrics, instead of the basic D+ Controlled 200A Relay, I fitted a 140A VSR instead. Only did so yesterday but working out pretty good
I reused the taillift 16mm cable which saved the job of routing a cable out the engine bay which was good. However this is protected by a 70A resettable breaker which is probably a bit small for full alternator charging of the Leisure Battery bank. Will leave it and see what happens and if necessary replace with a bigger fuse.
The VSR is working very well in terms of having the Solar charge the Starter Battery as well. I installed yesterday and had it working at around 5PM. This morning by 11:45AM both the Starter Battery and Leisure Battery Bank were fully charged and the Solar Controller in Float mode despite the Starter needing a fair charge and the Compressor Fridge and Inverter being on 24/7.
Last major change yesterday was to the AC Electrics.
Changing my layout meant revising the socket positioning. I have a relatively complicated 230V AC setup with 4 distinct circuits, but it is not complexity just for the hell of it. It works like this:
Circuit #1: 230V via Victron 12/500 Inverter.
This is on 24/7 and powers the AC Fridge, Internet Router and Booster, plus sockets to the 'dinette' area and bedside shelves for "always on" power availability
Then there is a consumer unit with another 3 circuits (each protected by its own DP MCB and with an RCD for the incoming supply.
Circuit #2: 230V automatically switching between 2500W Inverter and 10A Mains EHU.
This circuit is used primarily for the kitchen, with a dedicated socket for the 2000W Induction Hob and another socket available for portable applicances used on the worktop (e.g. a Slow Cooker or George Foreman Grill), plus an external 'commando' socket for outdoor use (power tools, outdoor lighting, etc).
This circuit has a contactor relay that detects the presence of a live EHU and switches to that output automatically, which means I don't have to have multiple sockets for cooking and can use the best power source available.
Circuit #3: 10A 230V EHU Only.
This circuit only has a single outlet located by the step
Step Socket by David, on Flickr
The primary purpose of this socket is for an electric heater if hooked up. I didn't want to use an EHU/Inverter switched socket for this in case the hookup tripped and I ended up drawing a massive amount of power off the battery bank via the inverter without realising.
Circuit #4: 6A 230V EHU Only.
This is dedicated to the Mains Charger and has just the single outlet close by it.
Now I have actually got one further socket for Circuit #2 in fact, located next to the Mains Charger socket
Sockets by David, on Flickr
The reason for this is should there be a problem with the Victron Inverter, I can move the plug from that inverter onto the Inverter/EHU circuit and use that inverter; or I could change say the Dinette AC socket to be powered from the big inverter instead for a while should I be doing something inside the van that demanded more power.
It looks a bit messy as need to clip up the cables still and fix the door slide bits, but the various sockets for Circuit #1 go into an extension block, protected by a 5A fuse (we are talking very low power devices here) and I can move any plug from this block to the spare socket opposite it.
I don't think I will need to do so, but a bit of extra installation now saves the potential hassles later on
So that pretty well covers the electrics EXCEPT for above your head! not yet installed the final lighting and using the courtesy lights still (reworked to use the Leisure Battery instead of Starter).
And still for other bits and pieces as well of course. Some minor and some more significant
Last edited:
Obanboy666
Full Member
- Posts
- 5,108
- Likes
- 5,433
50 litres of water doesn’t sound much ? I have a 90 litre underslung tank and usually carry an additional 30 litres in similiar containers you are using and often wish I could carry more.
Could you not fit an underslung tank that would allow you to carry more water and free up space onboard where your 2 x containers are stored.
Not sure whether you have a shower and what your daily water usage is but 50 litres wouldn’t last me long and I travel alone most of the time.
Could you not fit an underslung tank that would allow you to carry more water and free up space onboard where your 2 x containers are stored.
Not sure whether you have a shower and what your daily water usage is but 50 litres wouldn’t last me long and I travel alone most of the time.
wildebus
Full Member
- Posts
- 12,214
- Likes
- 17,815
No plans on a shower and I think that is where the water gets used up. I was away end of May and took 25L on Friday afternoon and came back with around 12L Sunday evening - that was with two of us.50 litres of water doesn’t sound much ? I have a 90 litre underslung tank and usually carry an additional 30 litres in similiar containers you are using and often wish I could carry more.
Could you not fit an underslung tank that would allow you to carry more water and free up space onboard where your 2 x containers are stored.
Not sure whether you have a shower and what your daily water usage is but 50 litres wouldn’t last me long and I travel alone most of the time.
What I like about having the 25L containers is the ability to carry them to a tap to fill them up (on my T5 I had a 13L container and typically refilled it on the Saturday evening, walking to the tap).
Underslung tanks means having to use a hose or maybe an aquaroll. And then cleaning them out ..... New water container if needed - under a tenner.
So I see where you are coming from, but for my purposes, a pair of 25L will do the job very nicely
Asgarth1977
Guest
That is one heck of a bus you got there, awesome work, defo the kitchen unit.
Carn't wait till i have a bus myself.
Michael
Carn't wait till i have a bus myself.
Michael
Discokegs
Guest
Another thumbs up from me. Great write up especially explaining your electric circuits.
Really surprised by the battery percentage when you got back from the VW show. I thought it was going to be well down as youd been running a slow cooker and the electric hob. Has certainly changed my mind on how solar is getting better.
:bow:
Really surprised by the battery percentage when you got back from the VW show. I thought it was going to be well down as youd been running a slow cooker and the electric hob. Has certainly changed my mind on how solar is getting better.
:bow:
wildebus
Full Member
- Posts
- 12,214
- Likes
- 17,815
Thanks.Another thumbs up from me. Great write up especially explaining your electric circuits.
Really surprised by the battery percentage when you got back from the VW show. I thought it was going to be well down as youd been running a slow cooker and the electric hob. Has certainly changed my mind on how solar is getting better.
:bow:
I need to confirm the exact spec, but I think the slow cooker is 180W so not too excessive? I use a slow cooker quite a bit at home and find it is great. Prep in morning, then clear up and so when meal is ready in evening, just got 2 forks and two plates to clean up after eating (use a slow cooker bag and so the pot stays clean as well).
I actually bought the Slow Cooker when I had my last camper - a T5 with 200W of panels as even then I found I had full batteries by around 10AM and wanted a way to use the free energy and save on the Gas use.
I was very pleased with the results as well - and this was all in Scotland as well of course!
And now I have the VSR in place, the batteries can also charge from the Alternator so any prolonged touring will be no problem at all whatever the weather.
I do have an emergency gas cartridge hob should the electrics fail me in some way. That typically also comes into use if want to do any 'smelly' cooking so done outside.
Deleted member 75172
Guest
And add another thumbs up from me.
Great conversion and excellent write up and absolutely easy to spot.
Pete
Great conversion and excellent write up and absolutely easy to spot.
Pete
wildebus
Full Member
- Posts
- 12,214
- Likes
- 17,815
Been trying to work out good table options. I don't think I will be using a fixed table much, but it is a requirement for Motor Caravan classification, so has be available.
I think I have come up with a solution. And this is the photo I will be sending to DVLA ...
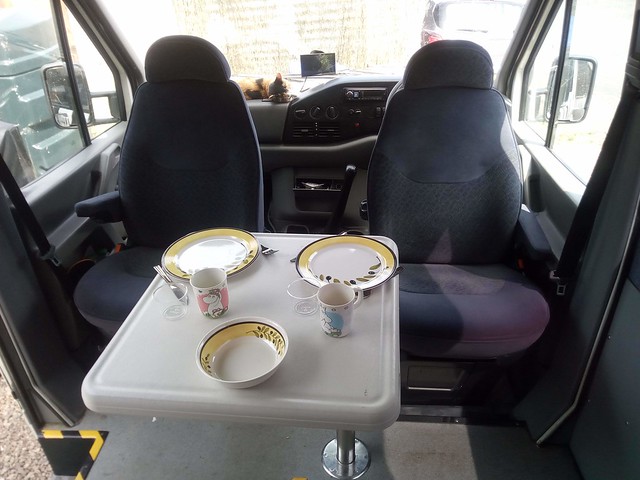 IMG_20180610_111454 by David, on Flickr
This shows the table on the removable post so attached to the vehicle as per DVLA requirements. But it is actually a standard Lifetime Table from Costco with folding legs, so can be used as normal and saves having to carry around a plain tabletop just for occasional use.
I also got round to cutting the £15 carpet offcut I bought a month ago to suit the living area ...
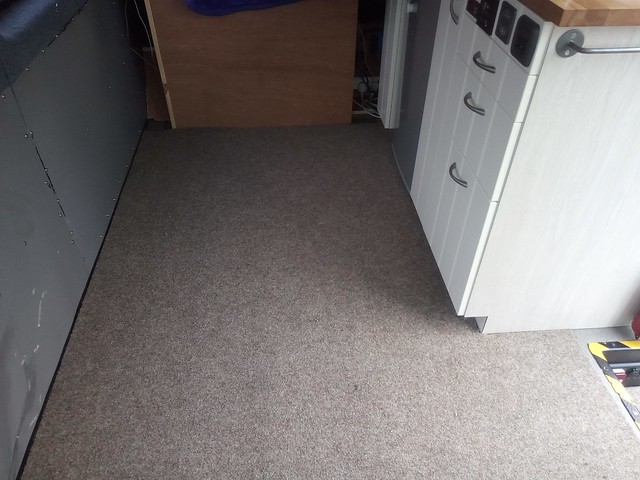
Carpet by David, on Flickr
Need to make a hole for the table leg of course. And need to decide where to trim the cab end. Probably will cut to put under the end trim piece.
Carpet by David, on Flickr
Also need to add a small section around the step threshold (the offcut width was just too narrow to cover that part as well ) but pretty pleased with how it looks for the price (this is a build on a budget!)
I think I have come up with a solution. And this is the photo I will be sending to DVLA ...
IMG_20180610_111454 by David, on FlickrThis shows the table on the removable post so attached to the vehicle as per DVLA requirements. But it is actually a standard Lifetime Table from Costco with folding legs, so can be used as normal and saves having to carry around a plain tabletop just for occasional use.
I also got round to cutting the £15 carpet offcut I bought a month ago to suit the living area ...
Carpet by David, on Flickr
Need to make a hole for the table leg of course. And need to decide where to trim the cab end. Probably will cut to put under the end trim piece.
Carpet by David, on Flickr
Also need to add a small section around the step threshold (the offcut width was just too narrow to cover that part as well
) but pretty pleased with how it looks for the price (this is a build on a budget!)wildebus
Full Member
- Posts
- 12,214
- Likes
- 17,815
Daft Mod time
So I fitted this table leg kit a week ago or so and used a Costco table as a top
 IMG_20180610_111454 by David, on Flickr
Travelling a few thousand miles south, a TV Programme I enjoyed watching was "Sea Patrol", a drama based around a ship in the Royal Australian Navy. and in Series 2 they got a new ship, and on the Bridge of that new ship they seem to have what looks to me like a Cat Scratching Post
 SeaPatrolPost by David, on Flickr
From the first time I noticed that, I thought it would be great to have some kind of scratching post in my Camper for the cat, who loves her scratching post AND loves chilling out in the van.
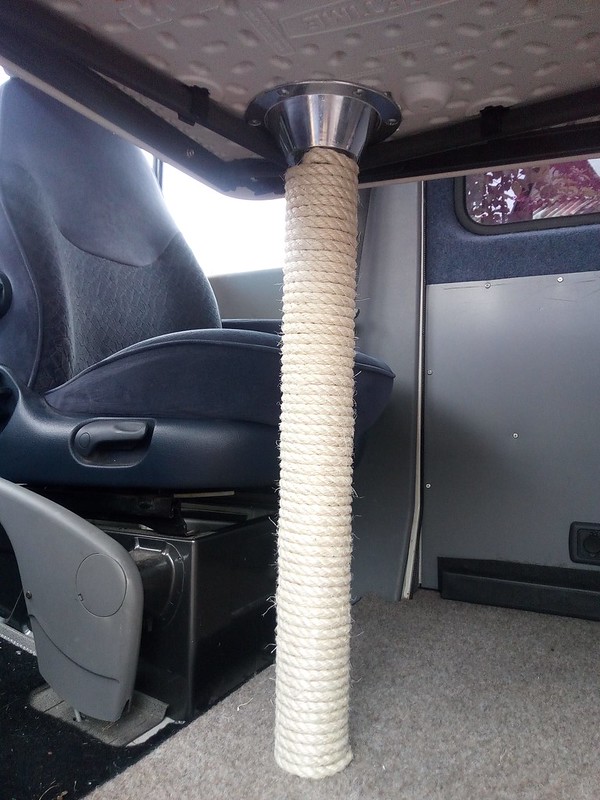
So moving back to this afternoon, I can now reveal my own weird update
 IMG_20180613_152115 by David, on Flickr
It kinds of matches in better with the general planned Safari theme of the van rather than a chrome pole as well :banana:
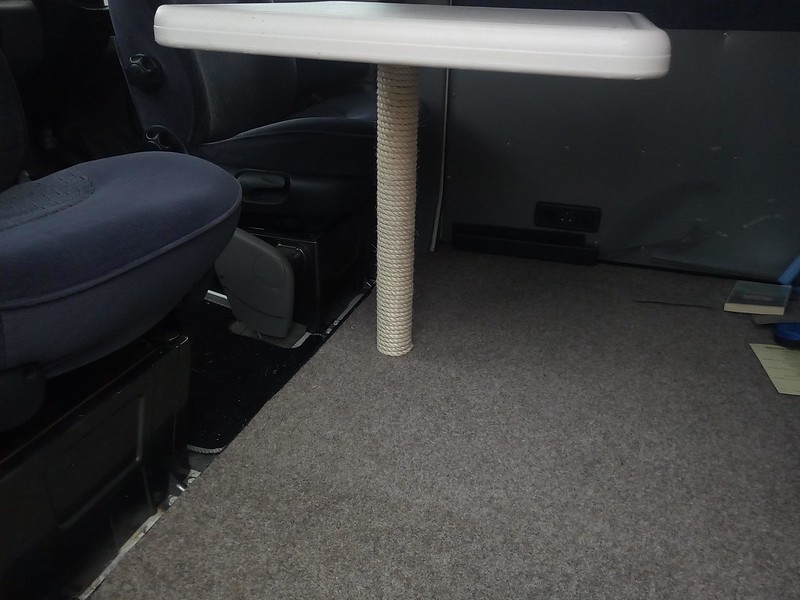
Oh, and an under table shot to show how the table itself is dual purpose
 IMG_20180613_152132 by David, on Flickr
The original legs are still fitted and functional, and the post mount is secured in place by both Sikaflex Adhesive and Bobby Ball (short and fat) Screws, plus the legs when closed go over around 30% of the mount surround which also keeps things nice and tight.
So I fitted this table leg kit a week ago or so and used a Costco table as a top
IMG_20180610_111454 by David, on FlickrTravelling a few thousand miles south, a TV Programme I enjoyed watching was "Sea Patrol", a drama based around a ship in the Royal Australian Navy. and in Series 2 they got a new ship, and on the Bridge of that new ship they seem to have what looks to me like a Cat Scratching Post
SeaPatrolPost by David, on FlickrFrom the first time I noticed that, I thought it would be great to have some kind of scratching post in my Camper for the cat, who loves her scratching post AND loves chilling out in the van.
So moving back to this afternoon, I can now reveal my own weird update
IMG_20180613_152115 by David, on FlickrIt kinds of matches in better with the general planned Safari theme of the van rather than a chrome pole as well :banana:
Oh, and an under table shot to show how the table itself is dual purpose
IMG_20180613_152132 by David, on FlickrThe original legs are still fitted and functional, and the post mount is secured in place by both Sikaflex Adhesive and Bobby Ball (short and fat) Screws, plus the legs when closed go over around 30% of the mount surround which also keeps things nice and tight.
wildebus
Full Member
- Posts
- 12,214
- Likes
- 17,815
Woooo Hoooo!
Well .... I didn't want to jinx anything by saying, but I sent the Motor Caravan Reclassification Request into DVLA a week ago last Monday.
I was hopeful but not 100% sure as I only have single Hob top and depending on what DVLA go on, some operatives will be ok with one 'ring', but others will want to see two :rulez: (In my letter I described it as a 2kW Hob, so it is blooming powerful!)
But as you can probably guess from this post ...
Computer says YES :dance: :heart: :dog:
Clarence the Safari Camperbus is now officially a Motor Caravan :cool1:

Clarence Caravan by David, on Flickr
So as well as meeting the Insurance Requirements (reclassify within 3 months) I can drive at car speeds (as I have a ticket from a certified weighbridge that the ULW is under 3.05t)
Well Pleased with that, and got the V5C back super-fast as well
PS. I also amended the number of seats from the 7 I chose last time I reclassified to a "Van with Windows" down to 4. Unlikely to ever be more than 2 but I can plug in 2 more single seats behind the drivers if I want, so covered that possibility
Well .... I didn't want to jinx anything by saying, but I sent the Motor Caravan Reclassification Request into DVLA a week ago last Monday.
I was hopeful but not 100% sure as I only have single Hob top and depending on what DVLA go on, some operatives will be ok with one 'ring', but others will want to see two :rulez: (In my letter I described it as a 2kW Hob, so it is blooming powerful!)
But as you can probably guess from this post ...
Computer says YES :dance: :heart: :dog:
Clarence the Safari Camperbus is now officially a Motor Caravan :cool1:
Clarence Caravan by David, on Flickr
So as well as meeting the Insurance Requirements (reclassify within 3 months) I can drive at car speeds (as I have a ticket from a certified weighbridge that the ULW is under 3.05t)
Well Pleased with that, and got the V5C back super-fast as well
PS. I also amended the number of seats from the 7 I chose last time I reclassified to a "Van with Windows" down to 4. Unlikely to ever be more than 2 but I can plug in 2 more single seats behind the drivers if I want, so covered that possibility
Last edited:
wildebus
Full Member
- Posts
- 12,214
- Likes
- 17,815
So I headed away from home last Thursday afternoon.
Thursday night was a WC POI pubstop (Red Lion in Irlam. Nice. Would recommend); Friday was driveway Surfing; Saturday in a field; then Sunday, tonight and tomorrow night Driveaway Surfing again then heading home.
Been a useful "field test" of the Conversion, especially given the high temperature throughout the time away so far! The fan has been running non-stop and is probably the biggest source of power. If I had a 'normal' battery pack and no solar I would have not been able to use at full power for very long!
Got a wee list of things I need to pack in future and some adjustments that are needed to make the camper more 'streamlined' internally. Definitely much nicer to live run than the T5 without a doubt, but still not perfect by any means.
The fridge has been running at upto 45C due to the high temps. The fan can't really do much as that is what the internal temps have been hitting, but it hasn't missed a but. Really quite surprised, but in a very good way.
The internal 'blinds' made from foil bubble wrap has done its job. Not the most decorative, but good and will keep them for Insulation even after I have the proper blinds done.
Biggest issue I have is loose luggage sliding around the inside And need to secure it somehow - probably by building a tall storage cupboard. And as well as luggage shifting, the portapotti is too! Not actually in use this trip, but just in for emergency and to to evaluate where it should go to a permanent basis.
So conclusion is still a work in progress but a very workable camper as it stands all the same.
wildebus
Full Member
- Posts
- 12,214
- Likes
- 17,815
This weather is making the Overland Safari Camperbus look at home :dance:
I am sure I spotted a basking Lion in the tree?
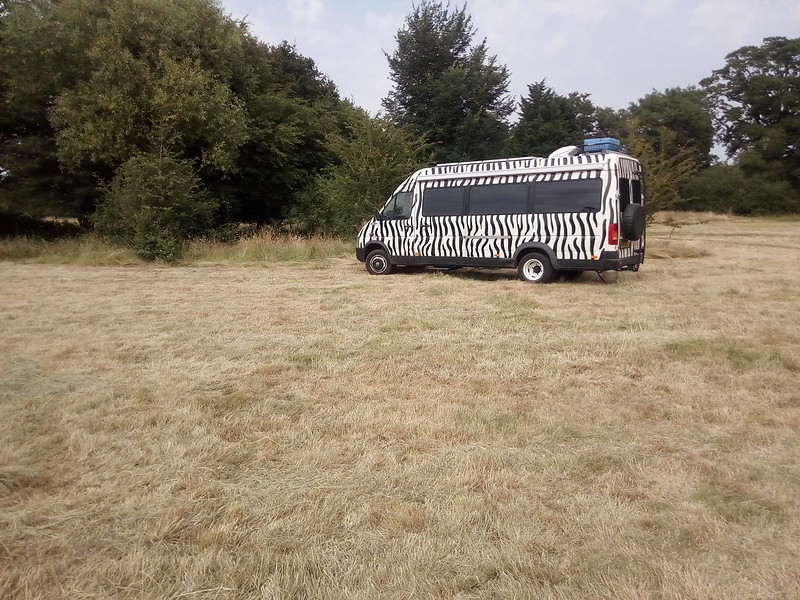 Searching for Game by David, on Flickr
Uh Oh. No, he came in for some shade!
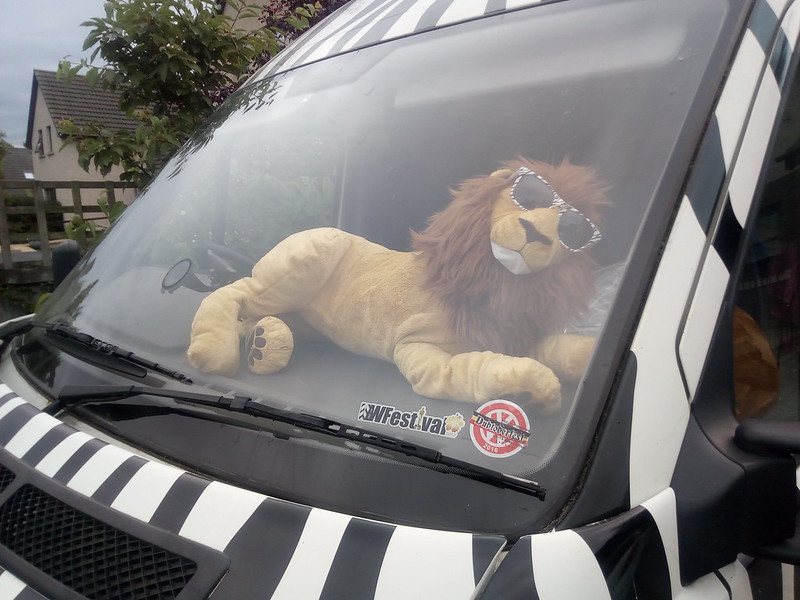
Clarence the Cross-Eyed Lion by David, on Flickr
I am sure I spotted a basking Lion in the tree?
Searching for Game by David, on FlickrUh Oh. No, he came in for some shade!
Clarence the Cross-Eyed Lion by David, on Flickr
wildebus
Full Member
- Posts
- 12,214
- Likes
- 17,815
So ... I have finally finalised my interior design - at least up to the height of the windows anyway!
I am NOT fitting a toilet/shower room inside as decided like the openness of the interior and ability to be able to walk around inside rather then do sideways shuffling :rockroll:.
So this large section behind the [swivelling] drivers seat is nice and open
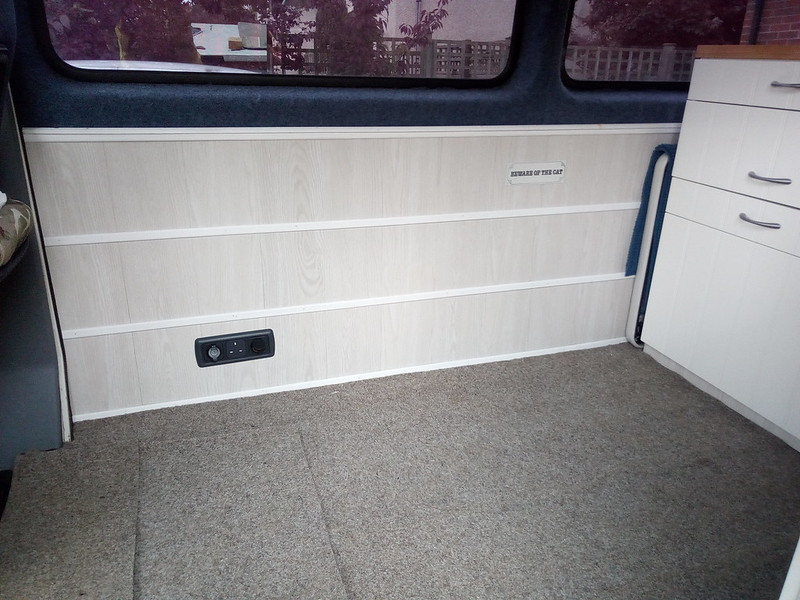
Dance Hall by David, on Flickr
Now I know what I am doing there I was also able to finish off the panelling to replace the pretty yucky looking plastic sheet with paint smears on it
You will have noticed the cupboard to the right?
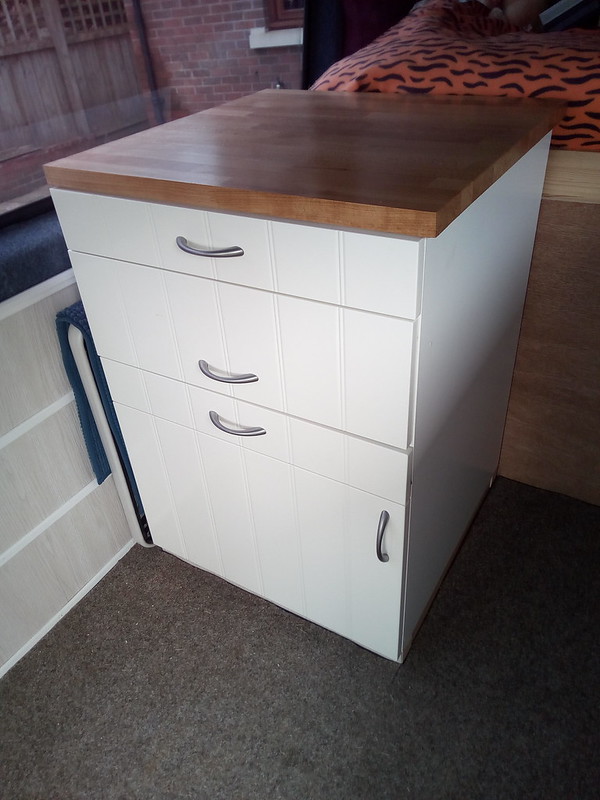
Mystery Cupboard? by David, on Flickr
This has been fitted slightly offset away from the wall to allow storage of the removable table at the side (with a bathmat to keep in snugly in position).
It is another IKEA Kitchen Unit with a bit of tweaking only really evident when you open the doors...

WC Cupboard! by David, on Flickr
The Bottom half stores the Portapotti. Not for use here, but a place to keep it out the way, stop it tipping over, etc. (yup, happened once a month ago but not after it had been used thankfully!). We have a Shower tent that can be put outside in the Safari Room which we put the loo into, but try to avoid using it generally if other options available. Back of the compartment is a storage section where I can keep paper, toilet chemicals and the like and to the left is a general storage area for cleaning and bathroom products. And finally on a small shelf above I have room for slim things such as a Laptop, trays and whathaveyou.
In the middle is a Drawer - not yet worked out what that will be used for but it will be handy for something no doubt.
The top looks like a drawer but is actually a pull to a top loading chest area
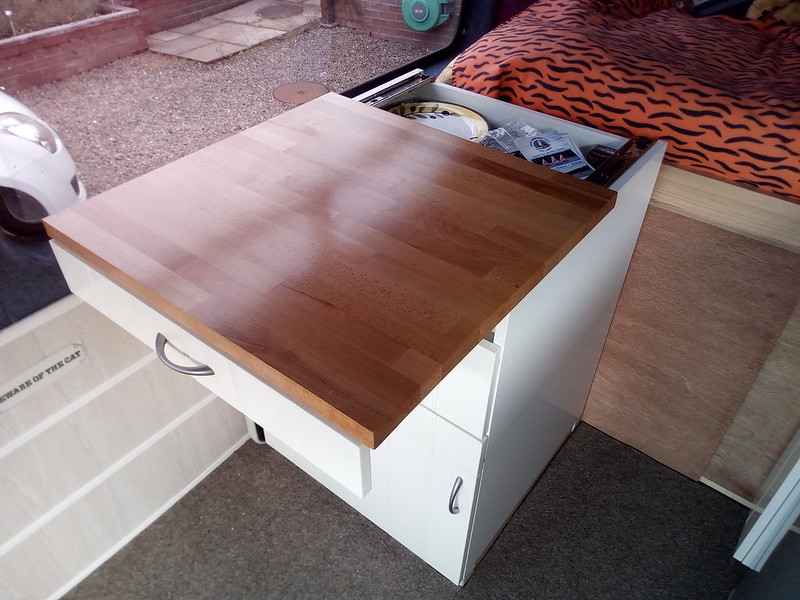
Ottaman by David, on Flickr
Handy extra worktop area as well of course and with the deep storage in there filled it with loads of random stuff right now.
Over to the other side, nothing significant has changed but a key thing I have added is an Upstand
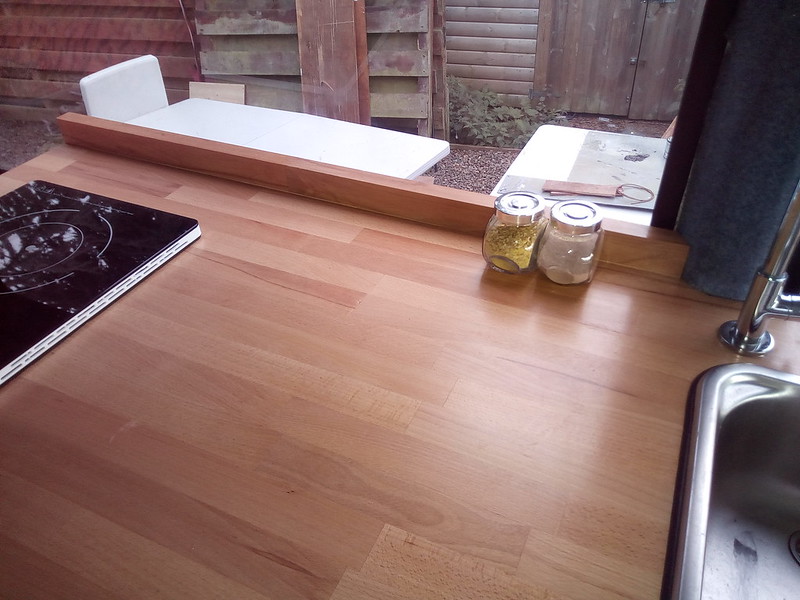
Upstand by David, on Flickr
This has been on the to-do list for a while as if anything sides off the top behind, it can drop behind the fridge and is virtually impossible to retrieve. So the Upstand goes down right to the window sill ledge so anything behind can be easily got back.
And means it is easy to just push bottles aside when cooking without loosing them!

Spices safe and sound by David, on Flickr
And added a little bit of wall storage by the door
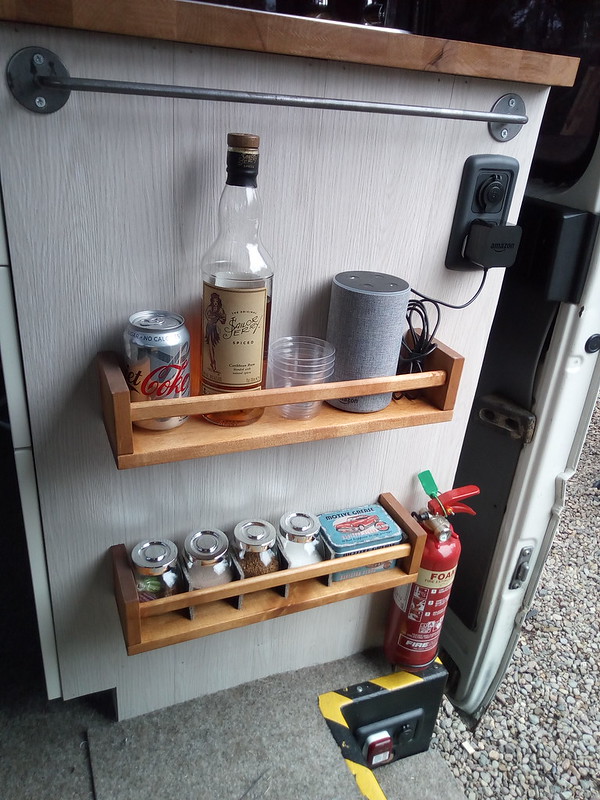
Racks by David, on Flickr
These are dead handy to keep the frequently used stuff such as Tea, Coffee, Sugar, Sailor Jerry Spiced Rumcool1, etc. Plus my Amazon Alexa Echo as well :dog:
Next van updates will be to the roof panelling that needs some tweaking and maybe some over-kitchen high (but slim) storage? I am also looking at a Hot Water system as well.
I am NOT fitting a toilet/shower room inside as decided like the openness of the interior and ability to be able to walk around inside rather then do sideways shuffling :rockroll:.
So this large section behind the [swivelling] drivers seat is nice and open
Dance Hall by David, on Flickr
Now I know what I am doing there I was also able to finish off the panelling to replace the pretty yucky looking plastic sheet with paint smears on it
You will have noticed the cupboard to the right?
Mystery Cupboard? by David, on Flickr
This has been fitted slightly offset away from the wall to allow storage of the removable table at the side (with a bathmat to keep in snugly in position).
It is another IKEA Kitchen Unit with a bit of tweaking only really evident when you open the doors...
WC Cupboard! by David, on Flickr
The Bottom half stores the Portapotti. Not for use here, but a place to keep it out the way, stop it tipping over, etc. (yup, happened once a month ago but not after it had been used thankfully!). We have a Shower tent that can be put outside in the Safari Room which we put the loo into, but try to avoid using it generally if other options available. Back of the compartment is a storage section where I can keep paper, toilet chemicals and the like and to the left is a general storage area for cleaning and bathroom products. And finally on a small shelf above I have room for slim things such as a Laptop, trays and whathaveyou.
In the middle is a Drawer - not yet worked out what that will be used for but it will be handy for something no doubt.
The top looks like a drawer but is actually a pull to a top loading chest area
Ottaman by David, on Flickr
Handy extra worktop area as well of course and with the deep storage in there filled it with loads of random stuff right now.
Over to the other side, nothing significant has changed but a key thing I have added is an Upstand
Upstand by David, on Flickr
This has been on the to-do list for a while as if anything sides off the top behind, it can drop behind the fridge and is virtually impossible to retrieve. So the Upstand goes down right to the window sill ledge so anything behind can be easily got back.
And means it is easy to just push bottles aside when cooking without loosing them!
Spices safe and sound by David, on Flickr
And added a little bit of wall storage by the door
Racks by David, on Flickr
These are dead handy to keep the frequently used stuff such as Tea, Coffee, Sugar, Sailor Jerry Spiced Rum
cool1, etc. Plus my Amazon Alexa Echo as well :dog:Next van updates will be to the roof panelling that needs some tweaking and maybe some over-kitchen high (but slim) storage? I am also looking at a Hot Water system as well.
Minisorella
Full Member
- Posts
- 2,797
- Likes
- 5,016
Looking really good David It was good to meet you and to have the opportunity to see your safari bus at Druridge Bay. You've done a fantastic job... enjoy!
It was good to meet you and to have the opportunity to see your safari bus at Druridge Bay. You've done a fantastic job... enjoy!
Last edited:
Clunegapyears
Full Member
- Posts
- 1,374
- Likes
- 1,542
Agree, You’ve created a stunning van. Always so full of admiration for people so talented. And just spotted you have more kitchen workspace that I have!!!
Sorry again about Oscar peeing on your awning!
Sorry again about Oscar peeing on your awning!
Last edited:
