Clarence the Safari Camperbus

Nice job, and very well executed. Could I enquire where you sourced the spare wheel carrier, Thanks in advance. Debs.:pc:
Hi Deb, and thanks :)

I gave the design and measurements to a local engineering company and they made it for me, and I then took it to a powder coaters (the guy did my wheels at the same time) and had it costed to match the ladder.

Have you a Sprinter? happy to give you more detailed info :idea-007:

(Ah - I think you have an iveco? got a photo of your rear end you could post? (the van, that is ;) ))

As i worked in this biz for years i would tell you that powder coating is useless for outside stuff unless it has been shotblasted and galvo coated first,just look at most car wheels after a couple of years.
Other wise i think the van is a hoot and watch the monkeys in longleat as they love pulling wipers of.:scared:
 
Well done pal and you know I can tell you have enjoyed doing this conversion
i would also be buzzing if I could do this but I surpose you could say we all could but no
i would be frustrated when things go wrong don't fit its confidence time passion, so like Manet of us
we buy already to go and hope things work most of the time, but hey if I see that big zebra coming
I'll be waving and I hope you like the attention you will certainly be getting that, again job well done

Thanks :)
I guess it is not a finish for stealth camping :raofl: (it is a working vehicle as well so the in-your-face finish should work well at festivals :) )
I am looking forward to getting the inside sorted out and being able to actually go away in it.

Could we all do this? Well probably not ALL, but many. I can do some bits very well, other bits ok, and other bits fairly incompetently. And another persons mix of the good, the bad and the ugly will be different, and also level of interest and physical abiities do come into it, so I wouldn't knock anyone who buys ready-made at all and definate pros for that approach :cheers:

Thanks again.
 
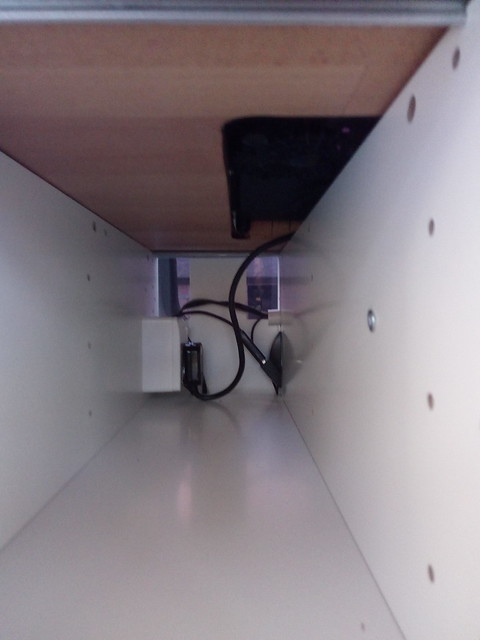
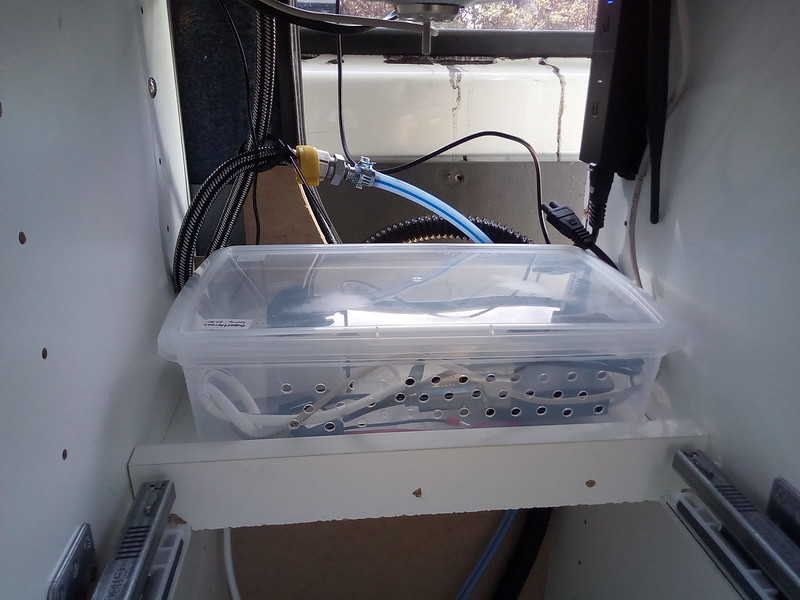
Not done a lot of changes in the last month as been too cold (even with a 500W heater inside running overnight the temp only got to -1C :( )

I bought a Caravanstore 225 back in September '16 to go onto the T5. I liked the way you could just slide it off the rail and store it out the elements out of season and is much less obvious when rolled up back into the bag.


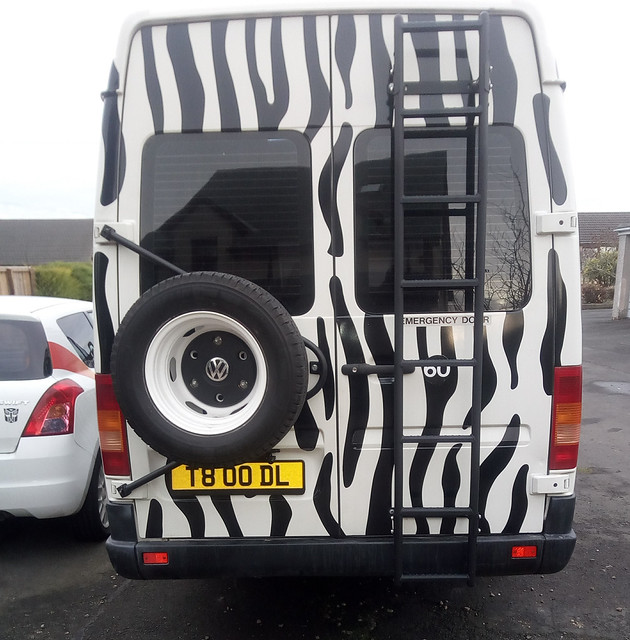
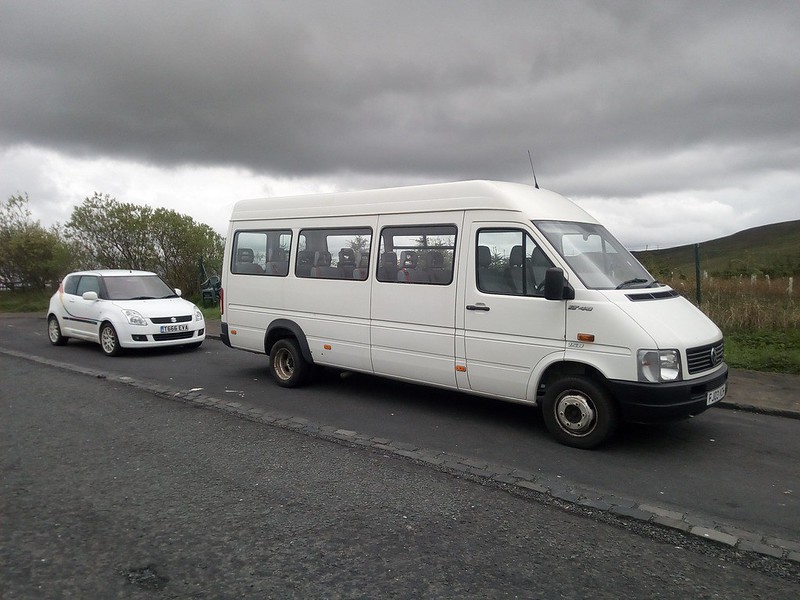
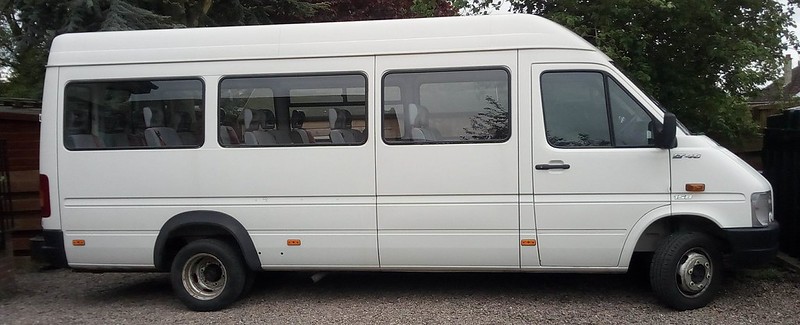
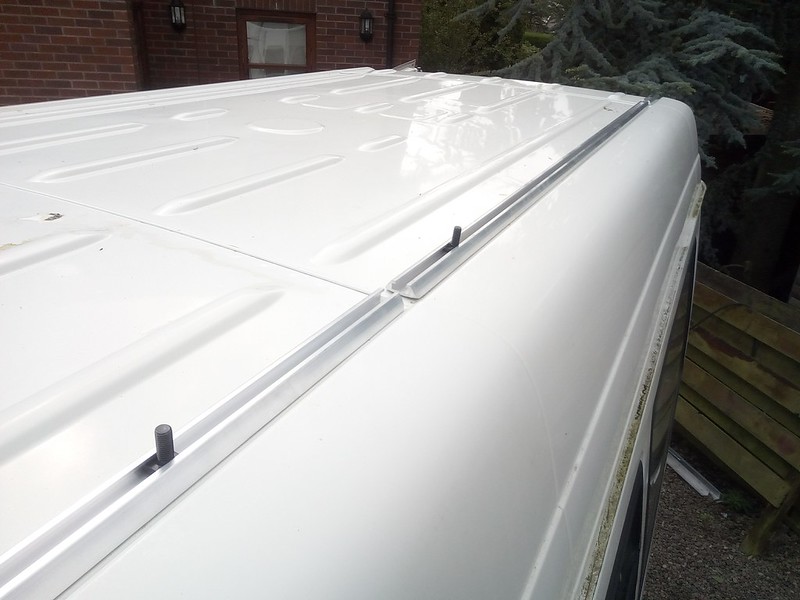
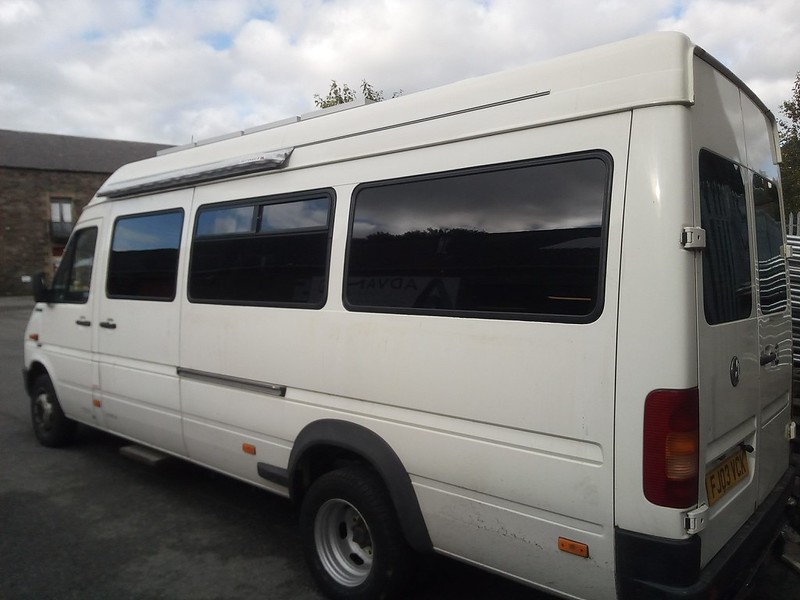
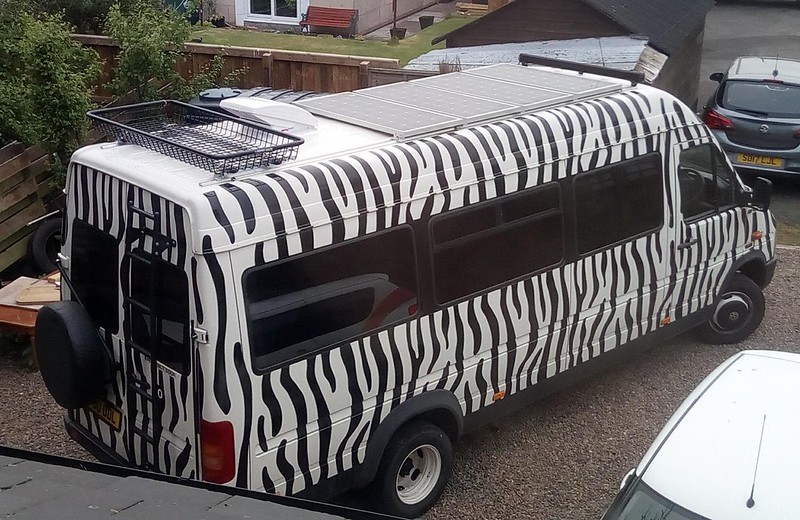
The 225 was a little short on the T5 LWB (I got the 225 because that is the one I found on Gumtree), so I always knew it would be much too short for the LT, so I had fitted a long Fiamma Rail as you can see in the picture below with the 225 slid on in readiness for a longer model (It was listed as a 4M length, but is actually 390cm long, not 400cm).

Caravanstore 225 on LT
by David, on Flickr

There are a number of different lengths of these Caravanstores, and with the rail length I had fitted the longest possible would have been a 360, but the 410 model (the sizes are in the name ;) ) would be the ideal one for the vehicle however.

So around the time of my last update I also bought another Caravanstore Awning, but this time I did go for a 410 T:
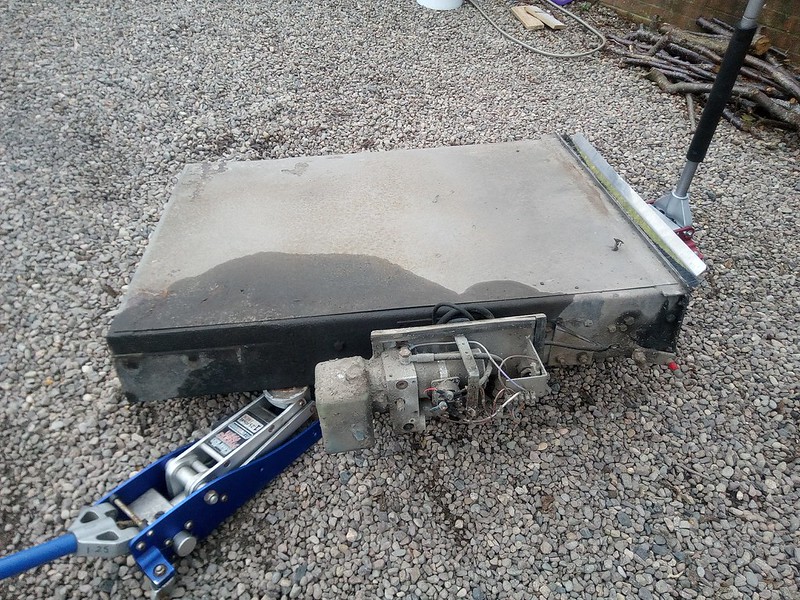
And around the same time I got ANOTHER 4M Fiamma Awning Rail and cut off 30cm to add onto the end to make a 420cm run. I do have a plan for the rest of the rail so it won't be wasted (which is good as this specific rail is only available in 3M and 4M lengths and I wanted the extension to match in design)

Since getting it, as mentioned, it has been blooming cold and not been inclined to fit it, but really needed to check it was all ok so I could get back the seller if need be in a timely way so bit the bullet yesterday and unpacked it...

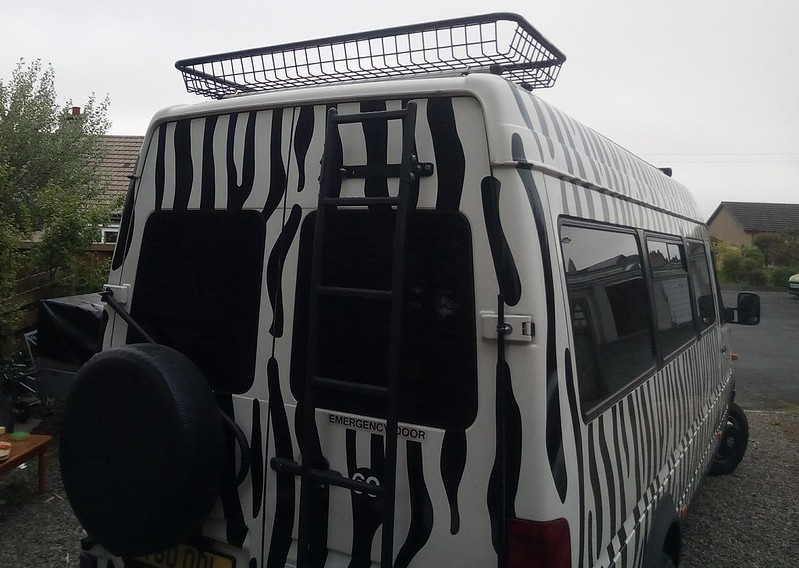
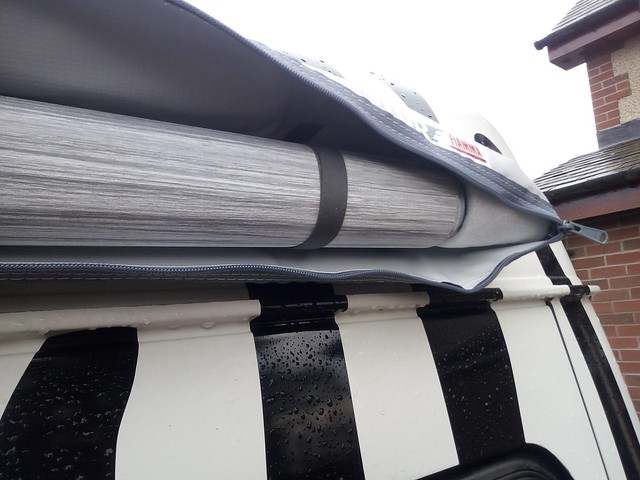
Bit of weight lifting with steady hands and a good eye needed for the next step ... Up on the hop-up platform around 4 foot from the rear of the van, lifting and twisting the entire awning to thread the end into the 8mm awning hole. Took about 10 minutes to do but got there in the end and just a matter of sliding along to centralise

Caravanstore 410 on LT
by David, on Flickr
(The yellow label in the middle is just a sticker on the bag which peels off)

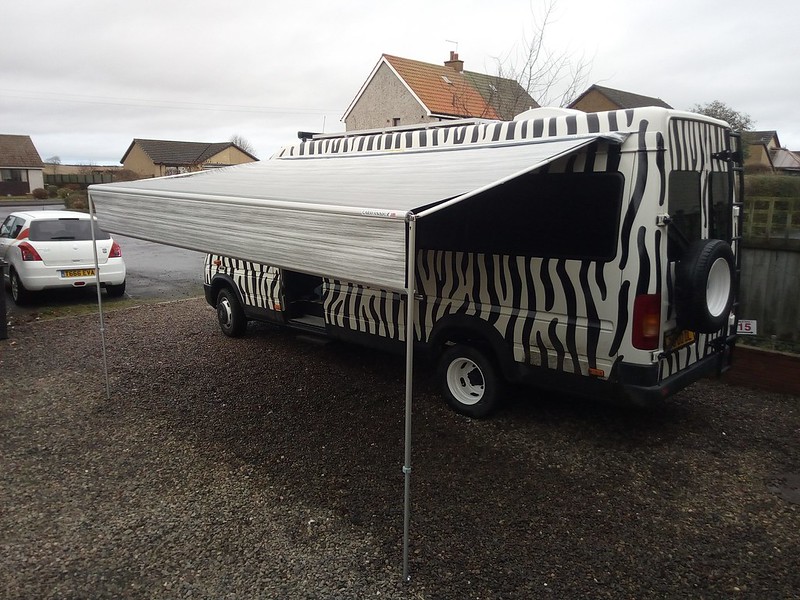
This did turn out to be the perfect length - the awning rail (after extension piece fitted) is as long as it can be on the LT LWB and the CS 410 fills the entire rail except for around 20mm at either end which will be used for the awning stops. Don't you love it when a plan comes together :D

To deploy the Caravanstore it is a matter of unzipping the bag and releasing the velcro supports. On the 410 model there is one at either end and one in the middle - this is one of the end ones

Velcro Strap on CS
by David, on Flickr

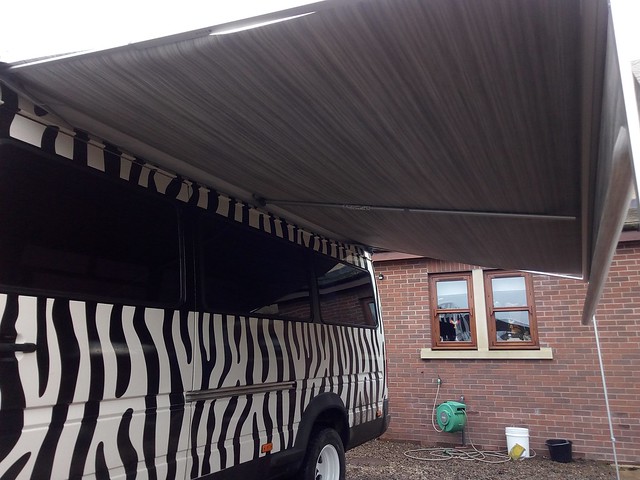
Then it unrolls and the roof and leg supports pull out of the end tube and fit into place - and here we are

Awning Deployed
by David, on Flickr

Same as any wind-out awning, the legs are adjustable in length - the picture shows the legs giving around 6' head height at the end.

This picture shows the underside with a central rafter which provides extra support on the longer models - comes as optional extra on the 360 model, but is standard with my 410 and also with the 440 (the 440 also comes with another central leg as well)

Centre Rafter
by David, on Flickr

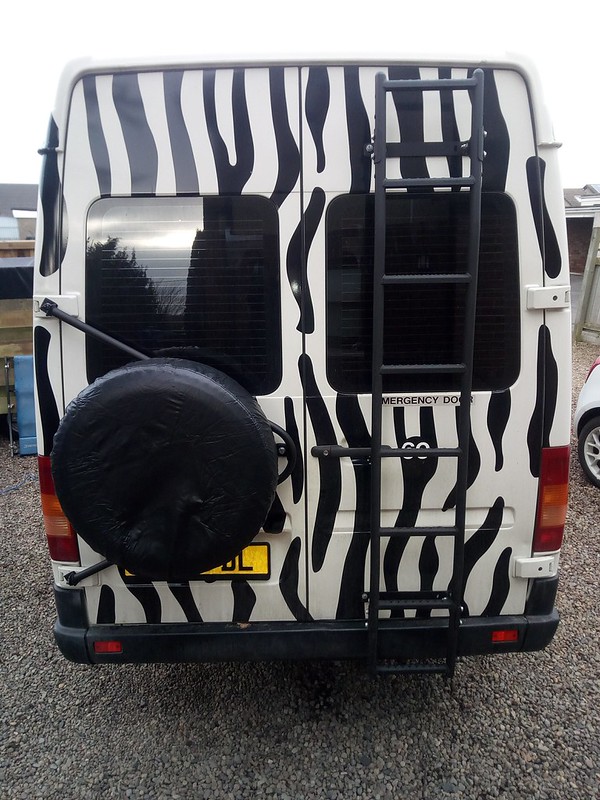
The previous Caravanstore 225 was in "Ocean Blue" which went well with the Off-Road Grey colour on the T4, but I opted for the "Grey" version for the 410 as I think it would work better with my Safari-style LT :cool:

Awning Top View
by David, on Flickr
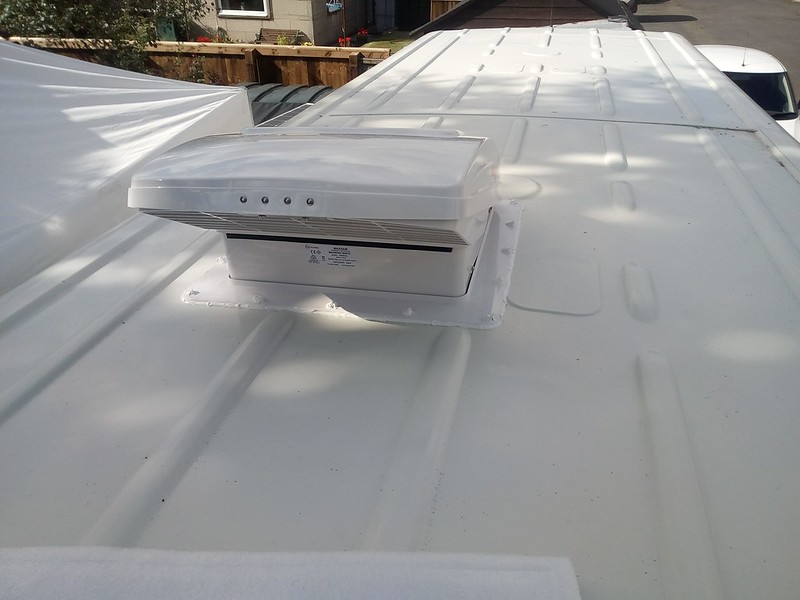
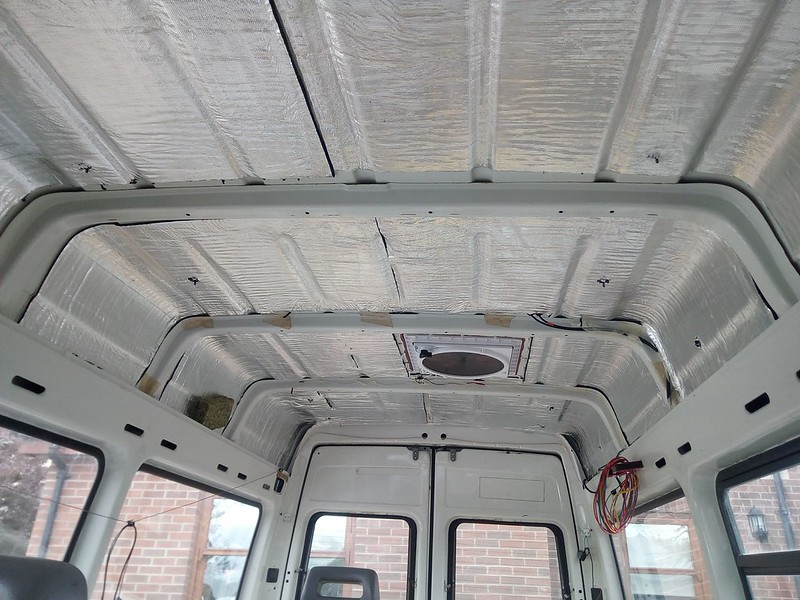
(I still need to finish off the top 'furniture' behind the Maxxair Fan)

When deployed for real, then I would use the supplied guy ropes to keep everything fully secure.


I also have the "Fiamma Privacy Room Caravanstore CS Lite" I bought at the same time as the awning (but from a different seller). I've looked at that and it looks fine (as it should as is brand new same as Awning) so going to wait until next Spring to fit that.
Essentially the Privacy Room will be replacing the Kyham Motordome I used on the T5. Obviously not a driveaway option, but I never actually drove away leaving the Motordome anyway (and would have worried about anything inside - or the awning itself! - still being there when I got back so unlikely to ever do so to be totally honest. The Motordome was always used as just an living area extension the same as the Privacy Room will be.

As far as Wild stealthy Camping goes, the awning and Privacy Room are not really appropriate, but when I go to shows and festivals I am there for 2-3 days amongst lots of other campers and like the option of more room.
 
Last edited:
I guess you're not the shy retiring type. It must get a lot of attention. Personally I love it. Inspirational build indeed.
 
I guess you're not the shy retiring type. It must get a lot of attention. Personally I love it. Inspirational build indeed.
Thanks :)

Not so long ago I would have needed as anonomous a vehicle as possible, but as you get older, it becomes a matter of "what the hell" :banana:
 
Oh, there is something else I DID do week before last ... Lost some weight :dance:

Well, Clarence did :)


What's missing from this picture?

Clarence Rear
by David, on Flickr


Well, compared to this photo, there are quite a few extra bits on, but .... no big under-chassis lift like below!

Rear Repaint
by David, on Flickr


This is the lift extended out!

Extended Lift
by David, on Flickr

I don't really have a use for a hydraulic lift, and I want to fit a towbar as well, and it is a matter of either/or and not both, so the lift had to go. Plus it is incredibly heavy!


I got a quote of £100+ (the £100 was the cheapest possible, the + bit was more likely to happen) from my local garage to remove, so that wasn't gonna happen. The nuts to the bolts securing the lift to the brackets were not captive, so as I loosened the bolt it just spun round, and the bolts holding the brackets to the chassis were covered by the lift :(

So time to break out the grinder :D

After removing the +12V supply cable (chunky 16mm job) and control cable from the control section to the van, then had to remove the rear wheels to access the front brackets (hence why I also did the stuff in the previous post), so did that and sliced the brackets - doing one side at a time for safety.
Then did the rear brackets (much easier to access!). Had the lift supported by jacks so it didn't just drop when the brackets cut through, then lowered the jacks and after a double-check drive forwards ...

Leaving Lift
by David, on Flickr


And the Lift free and clear!

Bye Bye Lift
by David, on Flickr


The companies tech sheet for the current ACCESS Lift says "Fuel consumption savings due to lighter weight – only 165kg" - so not much then! That is for a 400Kg SWL and mine was a 300Kg SWL, but I doubt if there is any significant weight difference. This out the way should improve my fuel consumption a little anyway :)

Right now the lift is stuck on my driveway as it is way to heavy for me to lift. No way I can get it in the back of my van to take to recycler. A scrap metal merchant was meant to come and take away but still waiting, so if anyone wants/needs a quality heavy duty lift, here if you are quick!


So now that chunk of metal is out the way, I could get my ULW done for real now ....

This is important once I get it re-classified as a Motor Caravan, as the speed limits for a Motor Caravan are based on Unladen weight only (which is actually daft as Unladen Weight is not recorded on any official DVLA documentation) and I want to be able to drive at 'normal' i.e. car speeds and not commercial vehicle speeds on Dual and Single Carriageways.

The key value is 3,050Kg Unladen Weight - above that you are restricted to commercial vehicle speeds, but below that you can legally do car speeds no matter how heavy and laden your vehicle is (did I mention I thought this is totally daft?)

So what will Clarence the Camperbus be allowed to do once reclassified? Here we go ....


CamperBus - Unladen Weight
by David, on Flickr

So we have a result :dance: We are actually 110Kg less than the limit which is pretty neat :D

And this is not a totally stripped out weight result either BTW.

As weighed, the Camperbus has -
Internally:
  • 2 front Single Seats with Swivels
  • 2 rear Single Seats
  • 100W Solar + 110Ah Leisure Battery* and all electrics (Solar Controller, 2 Inverters, Battery Charger)
  • 93L Fridge
  • 2 Hobs
  • PortaPotti
  • Table
  • Approx 30 kg of Misc Tools (4 socket sets, power tools, extending ladder, etc)
Externally:
  • 1/4 Tank Fuel (ULW officially doesn't include ANY fuel)
  • The Spare Wheel plus Door Mounted Carrier
  • 8 Rung Ladder
  • 4 Metre Awning
  • Roof Vent


What is obviously missing from the list above to make a usuable Camper Van is a bed - but I can get a bed frame and mattress inside for probably around the same weight as the collection of random tools, so even as a fully fledged Motor Caravan with a standard solar and leisure battery config we will still be well under the 3,050Kg limit when empty of our removable chattels

I've stapled one copy of the weighbridge ticket to the V5C so I don't loose it, and will keep the other in the vehicle should I need to show to some nice chap wearing blue.


*I say 100W Panel and 110Ah Battery - I did recreate this by removing 4 110Ah batteries and leaving 4 100W Panels on the roof - the 3 extra PV Panels are around the same weight as one 110Ah Battery
(Even If I left the 4 batteries in there the weight would still have stayed under 3,050Kg)
 
Last edited:
Been bit too cold to be doing much outside work on my conversion, so things had pretty well slowed down.
Got a few things sorted this weekend though.

I had used a grinder to slice through the lift support brackets previously as no way to access the nuts to remove them with the lift in place, so yesterday I finally removed the bits that were left (3 of the 4 parts anyway - back two were easy; fronts were impossible and ended up cutting though the loosened bolt on one to get off and left the other for another day as light had gone).

Also fitted a Spare Wheel Cover to keep it a bit cleaner. Only £6.95 and looks pretty tidy, especially at that price.

Wheel Cover
by David, on Flickr


At the front, I added a pair of blind spot mirrors.
Blind Spot Mirror by David, on Flickr
Really a van this size should have the double-mirror setup I think so you can have a proper rear view, but it doesn't and I don't trust the clamp-one ones to stay put, so elected for a pair of little adhesive ones.
These are on little bases so fully adjustable and they match the corner profile of the mirror housing quite nicely I reckon.

Inside started to sort out the stuff lying around and took out the rearmost seat so I can make a start on my bedframe and refitted one of the ceiling panels to get the upper shelving support sizing right.

One thing I installed about a week ago is a Victron BMV-712 Battery Monitor. These are very pricey meters and I was loath to buy one TBH, but took advantage of the eBay 20% discount offer day, plus the seller had a 5% Christmas Sale on, so took the plunge, as I knew I would end up getting one in the end anyway, as my Electrics Installation will be significantly the most expensive thing after the Van itself and I need to make sure I treat it right!
So I installed it, but as not having any furniture in place, needed a way to protect this expensive unit so printed off a case on my 3D printer - works well as a temporary home for the BMV.

Victron Box
by David, on Flickr

(this is it about an hour into the print)

Voltmeter Box Printing
by David, on Flickr
 
Slowly (as weather improves) doing conversion bits, but something I had hoped to put off until spring was a new Starter Battery, which I knew was quiite poor. But this recent very cold weather (colder then a normal cold Scottish Winter) seems to have been the last straw for it :(

Despite the battery reading 12.6V, a turn of the key kills it instantly down to 10.7V !

No idea how old the battery is, but even after a couple of recondition cycles it made no differerence, so time for a transplant .

The old and the new side by side

New vs Old
by David, on Flickr

The original battery is a 72Ah@C20 Battery, with a CCA of 670A - I always felt this seemed quite small for a 2.8L Diesel?
The battery I am putting in instead is actually the same as the ones I have in my Leisure Battery Bank, the 110Ah(@C100) Leoch XR1750 AGMs. These are dual purpose Leisure/Starter Batteries, so I reckon it should be up to the task.
The XR1750 battery in "starter mode" is a 92Ah@C20 Unit, with a CCA of 850A, so about 25% more Cranking Amps available :D

Battery is a fair bit bigger as can be seen in the first photo, but the battery tray is designed to accomodate a larger battery without any problems ;)

XR1750 Installed
by David, on Flickr
See - at least 5mm spare :)
Definitely worth fitting the biggest that can be accommodated I think.

I maybe decided to go a bit overkill with using this AGM battery. But being the identical battery model to the ones in the 440Ah bank the charging regime in terms of voltages will be identical, which is handy when the split charge relay is active so the Digital Regulator (once fitted on the alternator) can be set optimally.
 
Wow, I :heart: it!
Thank you :)

Got a few updates to post I think ...

Earlier Pictures showed me removing the Hydraulic Lift. This was needed to make room for this:

LT-Towbar
by David, on Flickr

Worked out very reasonable for a EC-Certified Towbar Kit as well:
TowBar with 13-Pin Kit - £99; TEB 7AS Bypass Relay - £17; 7-Pin to 13-Pin Converter - £5 = Total Cost £121


Main focus currently is making the permanent rear bed. Finished it in the main last Wednesday, but it was blooming cold and I picked up a chest infection working on it outside, so since Thursday morning been rough as a badgers behind :sad:
Hoping later this week will feel better enough to get the ply I need to finish it up and do the actual floor and side mounting.
 
Need to post a few updates to my build, especially as I am on the home straight in terms of being able to actually use Clarence as a Camperbus :)


But a diversion first ...

My Cat likes chilling in the house of course ....
IMG_20180430_103602 by David, on Flickr


But when there is a camper in the driveway she sits at the door waiting to be let inside :)

Kizzy chilling in Doris the Day-Van (VW T4):
imagejpg1-12 by David, on Flickr

Dozing off in Ichabod (VW T5):
KizzyT5 by David, on Flickr


And Lastly, checking out her facilities in Clarence the Camperbus (VW LT):
Cat Camping - LT by David, on Flickr

Looks like the latest conversion has the Cat Seal of Approval :wacko:
 
So finally completed the Galley Kitchen with all the wiring and plumbing :)

Like my previous conversions, I have used IKEA products as I like the look of them and I really don't think the weight disadvantage over the specialist lightweight is that great, and when you factor in the price difference ...... IKEA is the way :)

This is the Kitchen complete:

Galley Kitchen
by David, on Flickr

It is 1300mm in total length, comprising a 200mm Cupboard; Space for Fridge; 2nd 200mm Cupboard and a 400mm Cupboard.
The wide cupboard is separated into a lower cupboard area at the bottom and a pair of drawers at the top.
Worktop is a 27mm thick Solid Beech worktop from B&Q. Set into the Worktop is a 2000W Induction Hob and a SMEV VA9300 Sink plus a cold water only tap with flexible spout.

Weight wise, the entire Kitchen including the applicances (except Fridge), fittings, doors, drawers, worktop, shelves, etc comes in at a near exact 100Kg
Cost wise, the Kitchen, again including the appliances except Fridge, and up to the point of water supply and disposal hoses was under £300
I'm pretty happy with how this has turned out with the "Country Kitchen" look of Beech Worktop and off-white fronts.


Also now the kitchen is in, I could rejig my electrics to house them in their final home.

the Leftmost cabinet holds the electrics at the rear. I don't expect to have to access this very much so ok with them being blocked by other stuff in front
At the bottom is the AC CU
AC CU by David, on Flickr

Middle is the Main Fuse Box
DC Fusebox by David, on Flickr

Top is a Socket for the Induction Hob, plus some Comms Cables
Hob + Comms by David, on Flickr


Something I try and do when installing anything is do it in such a way I am access stuff and fix it later as needed (seems sensible to me!). So the sink plumbing is accessible from the outside by sliding the side door all the way back ;)
I wanted Drawers under the sink and got short ones that would not interfere with the hoses and waste. This gave me the space to make up a shelf to house my Electrics Management and Comms kit.

Comms
by David, on Flickr

As this is under the sink and so has potential for getting wet, I put the power systems and the Raspberry Pi (running Victron Venus GX software) into a plastic box with a waterproof lid and drilled holes in the side for ventilation plus a couple of larger holes for cable entry & exit.

Directly under the sink, I fitted a couple of control devices

Comms Front
by David, on Flickr
The left control is the remote for the 2500W PSW Inverter; the right device is a Victron BMV-712 Monitor

I will adjusting this in fact as I want to add in a fridge cooling controller and Water Pump and Water Heater switches and this seems to be the ideal place to add them ;)

Next steps is fit the Water Supply - Shurflo pump hopefully arriving next week and will be using water containers inside and under the bed - probably a pair of 25L ones.
Grey Water right now is just an open hose right at the back. By the time I use the Camper for outings I am hoping to fix a Grey Tank where the Spare Wheel is normally located. Just need to work out what (size, shape, price) I want there.
 
Happy Birthday!

Thought I would do a little "Then and Now" post on my Camperbus Conversion as it is precisely one year since I picked it up and drove it home :rolleyes2:


So THEN ...

On the Drive home ... This is at Carter Bar and probably the first time Clarence (who was not Clarence at that time) had been to Scotland.

Homeward Bound
by David, on Flickr

Very much a Minibus still here, with 16 seats plus drivers.

LT - Standard
by David, on Flickr
For the year (2003) it is very clean bodywork (some of these LT and Sprinters are rust buckets at a much younger age); The wheels are the main thing that let the side down, plus there is a rust streak at the front where I presume a driver forget he was driving a high vehicle and hit a barrier.


And NOW

A log of changes made - some major, some minor and some just mentioning as I like the result!

Alpine Radio installed complete with my patent Drive/Camping Switch plus Front-Mount USB Port.

LT-Alpine
by David, on Flickr
Also installed new front Alpine Dash Speakers


Swapped out original Driver plus double Passenger for a Pair of Swivelling Ford Galaxy Seats

Cab Seating Sorted
by David, on Flickr
This is a key change as it allows the cab space to become part of the living space. Required some small modification to the mounts and a new passenger seat base.


New Mat - helps remove the industrial look in the cab and also hides the missing section of the original flooring where the smaller base replaced the double seat

Cab Mat
by David, on Flickr


Maxxair Roof Fan

MaxxAir Fan
by David, on Flickr
Scariest part is cutting a big hole in the roof. Once that is done and the edges sealed, the actual fitting is fairly easy when approached logically


Installed Roof Tracking

Roof Tracking
by David, on Flickr
This will be the mounting for the Solar Panels and will make that job much easier. Used combination of 3M VHM Tape and Hi-Tenside Bolts.


Solar Panels Install

PV Panels
by David, on Flickr
Having the tracking fitting made the panel install very simple


Insulation

Dodo on Roof
by David, on Flickr
Used Dodo lining on roof and lower panels, followed by recycled bottle loft insulation, then silver bubble insulation. As I have a lot of windows, not sure how much of an effect this will actually have?


Had the Windows Tinted

Post-Tint
by David, on Flickr


Electrics Installation. This is it in progress, with the battery enclosure built and the 4 batteries wired up

Electrics under way
by David, on Flickr


Wheels

White Wheels
by David, on Flickr


Exterior Bodywork. This was changed with a combination of Paint and Vinyl. The Stripes are vinyl and the lower black section and the window frames and pillars are painted

Painting the Lower Section
by David, on Flickr


Spare Wheel Carrier and Ladder

Rear End
by David, on Flickr
The Ladder is an off-the-shelf Ladder from Rhino Racks.
The Spare Wheel Carrier I drew up and gave the specs to a local company to fabricate.


Goodbye Tail Lift

Exit Tail Lift
by David, on Flickr

And Hello Towbar

LT-Towbar
by David, on Flickr


Awning Rail and Caravanstore Awning

Rail and Awning
by David, on Flickr
I also have a Fiamma Safari/Privacy Room to go with this


Bed

Bed
by David, on Flickr
This is a modified IKEA Double Bed, raised to provide a good storage area below, accessible from the rear


Kitchen
Clarence Kitchen by David, on Flickr
Still got the finishing touches to do, but the Hob and Sink and in.


So we are basically gone from looking like this

Then
by David, on Flickr

to this

Now
by David, on Flickr


So still got quite a few things to finish off. I planned to have the camper 100% complete within the year, but the very cold weather this winter and the seemingly much longer one delayed work for literally months (I would go out to do stuff and have to come back in within a few minutes it was so cold :( My last camper I did outside as well and virtually everything done between November and Feburary a couple of years ago! )
 
Finally got round to fitting the main outstanding exterior bit of 'furniture'


Rhino Rack Basket
by David, on Flickr

This is a Roof Basket from Rhino Racks in Australia, bought in via Germany at a not inconsiderable expense (hence why I kept it when selling my T5, which I originally bought it for and had on until it went up for sale.
Decided it would suit my 'Safari Overland Camperbus' style and 8 odd months later it is on ;)
Reckon will come in handy for bringing back wet stuff like awnings, screen covers, kayaks and the like :)

Access is pretty good via the rear door ladder (also from Rhino Racks but much easier to get hold of :D )

Rear View
by David, on Flickr
 
Last edited:

Users who viewed this discussion (Total:0)

Back
Top