cheap citroen relay stealth camper conversion (ongoing)

did you scrap yer auld van , or do u still have it ...

Still have the old van, its been handy to have for bits and bobs. is now more of a storage shed than a van. i took it off the road in may, the alternator seized up a couple of weeks before the mot was up. other than that it was running great.


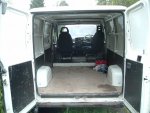
Here's a few pics of the new van. not a great deal of progress on the face of it, in the last 2 or 3 weeks though its been hands on apart from a few days out in the galloway forest.


just before its mot. nothing done apart from swapping the seats over.

newvan1.jpgDSCF0704.JPG


here's where things are at now.

DSCF0717.jpg


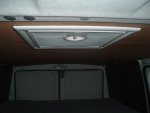
recent job i just finished was the ply roof lining and skylight.

DSCF0716.jpg


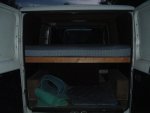
I'm doing a few bits modifying the kitchen cupboards so i can squeeze in a 4 gallon freshwater tank, i'll also soon start work on the space below the bed. The original idea was a walk thru(crawl) space, being able to access the back of the van when inside. I've scrapped that idea, instead it will be 2 seperate areas.
 
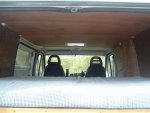
a few more pics.. (without the flash this time!)

newvan2.jpgnewvan3.jpgDSCF0721.jpgDSCF0724.jpg


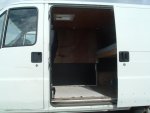
The holes along the bottom of the side door give a clue that it started life attached to a 02-06 model van. The same goes for the rear doors. Both have central locking motors fitted but not wired in. I'll need to read up on how the motors work as i quite fancy using them.
One difference between the last van and this one is the lack of windows on the rear doors. I think i prefer not to have the windows, it looks better, is more secure and feels warmer inside the van at night. Eventually a side door window will go in.
 
Thermal screens bfor citroen relay

Hi there,i have the same converted van,can anyone tell me where i can get the thermal screens at that price (35 pounds ),cheers shawbags.
 
Hi there,i have the same converted van,can anyone tell me where i can get the thermal screens at that price (35 pounds ),cheers shawbags.

The set I have is from justkampers.com i think i paid £25 inc postage. J13003: Thermo Mat Cab Kit (Fiat Ducato Supplied With Suckers) : Just Kampers

They also sell them through their ebay shop- search 'just kampers'. Make sure you order the right fitment for your van, the 94-02 ducato has different trim on the inside of the door from the 02-06 ducato.
 
i priced the sliding door thing at the top runner , it pulls the door in ,, shock of ma life , 76 quid plus vat ...
 
i priced the sliding door thing at the top runner , it pulls the door in ,, shock of ma life , 76 quid plus vat ...

yep terrible design, i had the same problem on the old van, the plastic roller is rubbish. I had to use a wedge behind the roller to pull the door in when shut, otherwise it leaked.

Your best move is to find an 02-06 ducato at the scrappy and remove the metal bar and roller that bolts into the sliding door, it will fit the older van fine. There's improvments to the design of the roller using something that's not cheap plastic, your door will shut tight.
 
what kind of wedge did u use mate , r yi goin to Daves and dianne,s wedding bud
 
what kind of wedge did u use mate , r yi goin to Daves and dianne,s wedding bud

ahh so you're Gary? The missus recently said someone who knows someone.... who knows me is doing a conversion. Im going to that wedding.
To pull the door in i used whatever was around, a philips screwdriver bit worked ok, even a folded up crisp bag did the job, eventually i cut a small thin wedge of timber that solved the problem. You need to remember it's there though I was constantly opening the door forgetting the roller was wedged in.
 
Last edited:
The set I have is from justkampers.com i think i paid £25 inc postage. J13003: Thermo Mat Cab Kit (Fiat Ducato Supplied With Suckers) : Just Kampers

They also sell them through their ebay shop- search 'just kampers'. Make sure you order the right fitment for your van, the 94-02 ducato has different trim on the inside of the door from the 02-06 ducato.

Hello again,i am now the proud owner of a set of silver screens from justkampers,£25 delivered,absolute bargain,many thanks for the advice,cheers Shawbags.:D
 
Hello again,i am now the proud owner of a set of silver screens from justkampers,£25 delivered,absolute bargain,many thanks for the advice,cheers Shawbags.:D

No probs, at 25 quid they're spot on and well recommended for anyone that doesn't have a set. When I first started looking for thermal window screens I was seeing prices between 50 and 70 quid. I wasn't sure about the ones jk were selling because of the low price, but all the reviews for the VW versions of the screens they sell were excellent, so I took a punt.
 
Interesting thread, thanks. I have done a similar thing myself. Kept it as a van which simplifies, and therefore cheapens, the insurance. Made the bed from 2 pieces of angle iron with a sheet of thick ply sitting inside them, holes cut through for ventilating the bottom of the matress. I suspend this contraption on 4 small ratchet straps, one at each corner, so its quick and easy to get the bed level when the van is not. The angle iron sticking up an inch at the side is just enough to stop the matress sliding off, and driling a hole through the corners is an easy way of hooking on the ratchet straps. You can feed the ratchet straps through rings in the wall to stop the bed swinging about if you forget to lower it before you drive off.
 
Interesting thread, thanks. I have done a similar thing myself. Kept it as a van which simplifies, and therefore cheapens, the insurance. Made the bed from 2 pieces of angle iron with a sheet of thick ply sitting inside them, holes cut through for ventilating the bottom of the matress. I suspend this contraption on 4 small ratchet straps, one at each corner, so its quick and easy to get the bed level when the van is not. The angle iron sticking up an inch at the side is just enough to stop the matress sliding off, and driling a hole through the corners is an easy way of hooking on the ratchet straps. You can feed the ratchet straps through rings in the wall to stop the bed swinging about if you forget to lower it before you drive off.
It sounds like a hammock sytem you,ve got , any pictures
 
Little update on the progress.


I decided to remove the wall and ceiling boards before furnishing, behind the ceiling ply is more of the good old camping mats, doubled up where possible. This stuff definately works well as an insulating material, some of the pieces are a little dirty as they have been recycled from the last conversion but are suitable for the purpose... yes the missus looks really interested as you can see! :lol-053:


DSCF0725.JPG


For the sidewall ply I have carpeted with Anthricite colour stretch lining from megavanmats. 3m x 2m of carpet and 3 cans of spray glue cost £44 delivered. I found it very easy to work with. 3m Mega Stretch Van Lining Carpet, 3 x High Temp Glue | eBay.

Ended up I had nearly 2 full cans of glue left and 1.5 sq/m of spare carpet at the end of the job.

I was originally going to carpet the ceiling with a colour slightly darker than what was on the sides but in the end we decided to cover with an imitation black leather, because of the proximity of the roof from the cooking surface it will be an advantage to have a wipable surface. The leather cost £23 delivered for 4m x 1.40m. The spray glue worked a treat for this but still was a lot trickier to fix to the ply, I coated the sheet of wood with a watered down pva glue mix to smooth it out a bit.

Fit into the ceiling is 4 standard fiat ducato courtesy lights bought from this seller on ebay eBay My World - greengravy33 £12 for 4. The lights come with standard 5w festoon bulbs which can be a drain on the second battery so on order from Japan is some led light panels that will fit into the frame and connect to the circuit with a dummy festoon bulb. eBay - The UK's Online Marketplace 36 leds should hopefully be bright enough.


DSCF0729.JPG


DSCF0727.JPG


Also now in it's permanant home is the modified kitchen cupboard unit, the additional piece added on the left will house a 25l water container. On top is a piece of 15mm furniture board from Homebase, I think its 2.4m x 0.6m and cost £30!


DSCF0728.JPG


You might have noticed the hole on the ply above the cupboards, in there will be a panel with switches and another jap ebay gizmo... a battery voltage monitor with in/out temperature clock etc... I've just finished putting it together in the last hour and hooked it to the 12v to see if it goes alright.


DSCF0732.JPG


Its a piece of 6mm ply covered in the same leather stuff thats on the ceiling boards, the 4 switches were bought on ebay for £7 and the voltage monitor gizmo I bought on ebay nearly a year ago for £10 delivered.


Still plenty of stuff to do and to keep the insurance company happy I will need to get an engineers report at the end of this month verifying that it meets their criteria for a camper conversion. With that in mind the focus for the coming weeks will be on fitting an island table leg, cupboards with hanging space under the bed and a installing a smev 2 burner hob/sink.
 
Aye yer getting there bud ,,, yi like yer gadget,s and gizmo,s
 
cheers guys, now a bit further on with the conversion i'll take some pics this weekend and post them up.
 

Users who viewed this discussion (Total:0)

Back
Top