Sully the LDV Convoy

:nicethread: Just come across this thread
Great work done. I hope you have many many more good times away in Sully :have fun:
 
Thank you for the kind words both.

I suppose I'm like many on here, in that I'm always thinking about the next bits and bobs that need doing, or that might be an improvement.

I still have to tidy up the loo area, and the wall carpeting is patchy where I moved internal walls about and a bit tatty, plus a few other bits n pieces, but we can jump in and go (and have done) this summer - so I might have to get a few bits done over the winter yet.

I've toyed with the idea of another roof light over the galley area as well, as the van only has the side door window and the front glass (the area in front of the rear doors is storage so no point in windows there) so some more natural light in the living space would be nice.

But at least most of the potential mechanical and structural type concerns are abated somewhat - I'll be happier to know that Sully is protected and much better prepared underneath through the dark and soggy months ahead.

I'm hoping that the waxoyling treatment will also act as additional sound insulation (and insulation insulation!) for the floor as well - every little helps with a slightly rowdy 2.5Di y'know!
 
Like your way of thinking.And like what you have done to your LDV.We recently bought a 1991 mercedes home converted campervan reasonably cheaply,and at present are at the stage you were two years ago.Sorting interior tweaks to suit us,and gonna sort some rust under bonnet and underneath.Also the front carpet foam backed was wet so like yours ive taken it up and need to find where the water is coming in.I think maybe windscreen leaks.but not sure.Its fun sorting a vehicle which can give you the same pleasure as one costing many pounds more.:D


regards Michael

Good luck with your van!
I dont know anything about the Merc scuttle layout, but I found that as the LDV had some of the water soaking the front cab carpet coming in around the wiper spigots where they exit. I fitted extra O rings under the where the wiper arms seat on the splines, and also used Sikaflex to make small roofs above them to divert rainwater around possible ingress areas under the windscreen bottom trim. Also masked off the paintwork around the windscreen seal and then coated the rubber seal with black Sikaflex to make sure no water could get in through there either. Worked a treat.

I like the old boxy Mercs, they are nice and simple, perhaps slow but solid and reliable. Plenty of room too!
 
Couple of snippets of my Renault that I converted a few years ago, redundant now as I have a Burstner. Just can't seem to let it go, had it since 2005, 81K miles 2001 plate, never let me down cost me less than £500 in repairs all the time I've had it.
Interlocking slats form the base of the bed and the pull out section then drop the back cushion into place.
Originally it was going run the full width but decided leaving both the side door and rear doors accessible when it was in the sleep position worked better.
Sorry don't seem able to rotate them.
2mqt5k1.jpg
koqxi.jpg
 
Last edited:
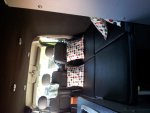
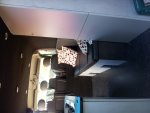
Our bed is 4 feet wide and its length goes right across the van up to the side door, and so we sleep across the van, not in line with it.
luckily the LDV is wide enough to allow this, just, at a smidge under 5' 10" I am very comfortable.
the layout also gives us floor space in front of the galley and access to the loo cubicle with the bed fully made up.
best bit about that is being able to get up in the am, make a brew (or even full breakfast) and then get back into bed to enjoy the cuppa, without having to move anything or pack anything away first.
We have a small fold out table that sits neatly between the 2 front seats to put one persons hot brew on within easy reach, while the galley side has plenty of worktop for the other brew to stand on, so we can enjoy a leisurely beginning to the day.
We can also still get in and out of the van via the front passenger door with the bed made up without too much drama, as the front seat is swivelled 180 degrees and can be moved forward on the runners, while you can still open the side door and climb in and out from the foot of the bed as well (of course thats less practical, but its an option).
 
Our Camper Bertie broke at present and was going on holiday for a week tomorrow grrrr

Good luck with your van!
I dont know anything about the Merc scuttle layout, but I found that as the LDV had some of the water soaking the front cab carpet coming in around the wiper spigots where they exit. I fitted extra O rings under the where the wiper arms seat on the splines, and also used Sikaflex to make small roofs above them to divert rainwater around possible ingress areas under the windscreen bottom trim. Also masked off the paintwork around the windscreen seal and then coated the rubber seal with black Sikaflex to make sure no water could get in through there either. Worked a treat.

I like the old boxy Mercs, they are nice and simple, perhaps slow but solid and reliable. Plenty of room too!

Well found back brakes leaking fluid.Took me over a week due to many wrong parts sent from ebay although they were described as fitting my van type.(in the finish I had to have rear brake shoes relined.cost more than new shoes would have cost which I couldnt buy.no one stocking them!)but I thought I had cracked it but now front right caliper leaking.I couldnt undo the bolts to chassis so took it to garage to do front caliper offside,the garage I dont know but it has a good reputation.Well yesterday It was costing £160 for offside front caliper supply and fit,which today changed to £450 as the garage has stripped back brakes as well ((to be fair I never replaced rear drums)and they say they are grooved,and my new cylinders are leaking he says due to cheap parts.I got em from euro car parts!.Well Im no mechanic but had done my best.At 8.30 this am he phoned to tell me now costing 450pounds for new drums new cylinders to rear and if I agree he would have it finished late pm.I had to agree due to swmbo wanting holiday tomorrow.Well it seems he got sent the wrong size rear drums in right size box? so now gotta wait till Monday hopefully to get Bertie camper back!Still unsure if drums are availableSo no going to holiday now tomorrow!

Im sat here sad now trying to keep my chin up but older vans have there drawbacks it seems,although we still just love Bertie
 
Our LDV

Really interesting to read what you've all been doing to your LDVs. We have been the proud if perplexed owners of an 02 LDV for two weeks. It's been a challenge for me to drive it, let alone tinker! Two previous owners, the police and then a bloke who DIY converted it. Very rough and ready but it was cheap and local to us on a well-known auction website! It has a wooden unit and work top across the back with spare wheel and tool space, partitioned off to house the calor gas and water tanks, three ring hob and simple pump action sink. A table that slots on to legs and cones off so you can pull out the double futon, attached by ratchet straps and carabiners to steel hoops on the floor. That's pretty much it! Has a leisure battery but needs wiring, a fridge and strip lighting, also needing wiring. And a diesel heater that needs wiring up also. So need to get electrics sorted.....and then hopefully start heading out for adventures :-D
 
ldv spares.

Eurocar spares stock a lot of parts for the convoy,cheaper than you think,order online for cheapest prices and pick up at local store, had our convoy for two years now,doesn't get used enough but there if we want,taking it to newquay boxing day for a couple of days.
 
Thats really nice and neat NB! A totally different layout to mine (which is a bit unusual maybe, but we find it suits us, although I really do fancy putting in a clear skylight to get some more natural light inside, esp over the galley area).

Probably the single item that had the most positive effect to our van was fitting the 2 swivel seats instead of the std drivers seat & passenger bench - it opens the living space really well, as well as giving us more room & access when our bed is made up.
 
Really interesting to read what you've all been doing to your LDVs. We have been the proud if perplexed owners of an 02 LDV for two weeks. It's been a challenge for me to drive it, let alone tinker! Two previous owners, the police and then a bloke who DIY converted it. Very rough and ready but it was cheap and local to us on a well-known auction website! It has a wooden unit and work top across the back with spare wheel and tool space, partitioned off to house the calor gas and water tanks, three ring hob and simple pump action sink. A table that slots on to legs and cones off so you can pull out the double futon, attached by ratchet straps and carabiners to steel hoops on the floor. That's pretty much it! Has a leisure battery but needs wiring, a fridge and strip lighting, also needing wiring. And a diesel heater that needs wiring up also. So need to get electrics sorted.....and then hopefully start heading out for adventures :-D

Weve grown rather attached tl thd simple charms of our LDV, & we use the van quite a bit for weekends away, plus its often my transport & base for going mountain biking.

Good luck with yours - I've not found wiring or the night heater to be tricky to sort out - once you get your head around them its ok.
 
More Tinkering and a Water Ingress Leak.

Recently I yanked out all the front seats and the rubberised thick floor matting in the cab again. I decided to add some of the heavy foil-faced underlay designed for putting under laminate floors in the cab area to improve sound and heat insulation.
I'd already cleaned, pained and sealed the floorpan before, and then covered the floor in Flashing Tape as a sound-deadener. This was just to add some more.

That all went ok, then Lisa found a chunk of carpet offcut from the house (pseudo-Hessian backed, not foam) with a reasonable pile. So, while the seats were out, I put the heavy rubberised floor cover back in, and then wanged in this carpet as well, and then reinstated the seats. Some rubberised car mats got added to protect the carpet and job done. A wee bit quieter and warmer than before - didn't cost much and happy days.

I also glued more of the laminate floor insulation/underlay stuff to the bed base (looking to try and insulate the mattress more from any colder air underneath the base) and then stuck adhesive carpet tiles on top of that (multi-purpose - to add a fibrous layer for extra insulation, protect the silver foil face and to give some purchase to the cushion bases so stop them shifting when the sofa was made up in transit).

But... I'd noticed for a while that there was some intermittent and inconsistent water ingress - showing up inside the cloakroom about halfway down the nearside of the van habitation area. I'd already sealed the gutters so I had to go looking further.

On Saturday I took the Fiamma Awning off (quite a heavy old lump!) and quickly saw what the issue was - a dirty great crack in me roof section! There are 3 brackets that the Awning hangs on - and the rearmost had inflicted some damage to the glassfibre hi-Top construction it was mounted on. The other 2 are fine, so I'm guessing that at some point in time the previous owner (My van wasn't built by me, though I've changed most of it since) must have bashed it. Its not like whoever did it didn't know though, as I found some filler pushed into the crack - they just didn't fix it properly which resulted in the mess.

Problem was, that a thin smear to plug the hole hadn't actually strengthened the weakened Hi-Top glassfibre, it was just a bodge to try and keep water out. So, the weight and pressure of the Awning had made the crack spread out either side of the bracket, maybe a foot long overall, but hidden by the Awning so the only way to see it is when the whole awning is off the van.

I'm no bodywork repairer, but I figured I had to have a go at fixing this, so I started that afternoon. I removed the inner section and the insulation to be able to get at the bracket mounting bolts and get a good look at the inside damage and what I could do there. Not too bad to get at and nothing in the way.

Local Garage had P38 Glassfibre and a reinforcing mesh mat, so I bought a tin and a mesh.
Back at the van, I cleaned the surfaces, then sanded and scored the surface where I wanted to give the repair glassfibre a good key.
I drilled 2 small holes at either end of the crack (to prevent the crack travelling further) and then filled the outer side crack and the holes I drilled with a thin skim of P38 and Hardener.
Then I covered an area getting on for a square foot on the inside with fibreglass, then pressed in the mesh as a reinforcement, and then added a final layer of glassfibre over that.

(I have no idea if this is the proper way - how you're SUPPOSED to do this btw - but its what I have done :D).

Left it overnight, and it had cured pretty well on Sunday am. Much stronger - probably a fair bit stronger than the panel was before. Pity its an ugly pink glassfibre smear on the outside of the van - although I hope that a sand down and some paint, plus the fact that the Awning body will cover 90% of the repair will mean it'll look fine when finished. The most important thing is that the leak should be banished and it should be strong enough not to crack or fail.

As soon as I can I plan to rub down and spray paint to try to make the repair look as invisible as possible and then before fitting the Awning bracket and the awning back on, I've worked out that there are 2 metal supports on the inside that I can use to further brace the bracket area by putting a wooden cross-member between before replacing the insulation and the inside covering so its all out-of-sight - this is in my rear 'boot' storage area too which makes life a lot easier.

Now... assuming I have fixed my roof leak - I then have to try not to create a new one! I've bought a skylight to fit, so chopping a big hole in the roof is also on the cards in the near future!
 
Update.

1. I fixed the leak / crack ok. P38 glassfibre etc. and some internal bracing for added heft and the Awning went back on no bother. its rained a fair bit since and all is warm and dry.

2. The extra insulation has had a positive effect.

3. Insulating the bed base with laminate floor silver faced underlay WORKS from an insulation point of view. But, the non-breathable silver face would be easily damaged and also would make the liklihood of getting condensation-damp cushions/mattress worse. However... I've found that my idea of covering the insulation with adhesive carpet tiles works REALLY well - warmer bed and nice dry bedding. Only downside is it adds a bit of weight to the bed sections, but no biggie.

I still have to take the plunge and install the extra roof light though!
 
New Roof Light Installed (Finally)

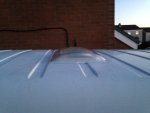
Had a few days off, so finally 'took the plunge and chopped a hole in my van roof to fit a small extra skylight, to add to the new exhaust rear 2/3rds I bunged on a few weeks back.

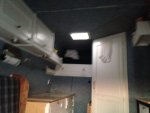
The galley area has always been a bit gloomy, plus I wanted a clear skylight so that we could have natural light 1st thing in the am to get dressed by, make a cuppa etc (with the screens still in place). The skylight is to address these points, and needed to be small to fit where I wanted it.

I found this item online at a decent price (think it was 40 quid). Its clear and can be popped up and is double-skinned, with the inner face having vents so it can breathe even when closed - handy over the galley area. You can also open it tilted so you can have it open in transit without it flying to bits, and there's an internal bug screen.

I just took my time and was careful, and it went ok, and does make a useful improvement.photo 1.JPGphoto 2.JPGphoto 3.JPG

(The last pic is from our Easter weekend mini-break to Snowdonia, taken off the side of Cader Idris - I just added it cos its a nice view!).

Ive also tinkered slightly with the fuel inj. pump and have been checking mpg. Good ole Sully has done handsomely for an old design, returning over 31mpg, even clambering around Wales' lumpy scenery. I am happy with that.
 

Users who viewed this discussion (Total:0)

Back
Top