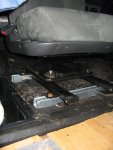
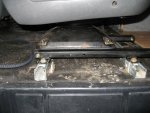
single passenger seat for 2001 transit

Fitting another seat......

In case this helps....

I just fitted new 9well different seats into my LDV Convoy. The passenger seat was a bench seat, and like you the gap from driving to clambering into the living space was narrow, and the bench seat made the living space feel more cramped.

I wanted a pair of swivel captains seats. I took a gamble when i found a nearby pair of middle seats out of a Mitsubishi Delica people carrier thing on eBay, bid on them and won the pair for £72.

I was able to graft the base of the LDV seat onto the Delica seat using some 3mm galv plate and a few bolts. It was the passenger seat that was the problem, as the rails the seat came on didn't line up with any of the existing mounting points on the floor.

How I got around it was by using stuff called 'Unistrut'. This is stuff used by industrial electricians and so on to mount heavy electrical panels on walls, or to fabricate free-standing frames. Think of it as grown-up Meccano!

The unistrut is like box-section, but with one side slotted - so from the end it looks like a 'U' (only there is an internal 'lip' at the top of each upright).

I drilled the Unistrut at the base of the 'U' so that it could be bolted L-R across the van onto the existing F & R original seat floor bolt points in 2 rows (F & R mounting points). This meant that the rails on the seat I bought could be shortened to suit, and (as the rails run F-R) could be laid on top of the unistrut.

You can get al sorts of inserts that go into unistrut to enable things to be bolted to it. So I slotted in some M10 threaded inserts, and then bolted the seat rails to the Unistrut.

The good thing about unistrut is that of course it does not fix you to bolting at a specific point along its length, so in effect it is infinitely adjustable along its length for mounting things. So I was able to mount the seat just right (L -R) , so it could swivel 360 deg without clouting the passenger door etc. but without taking up any more of the centre space I wanted than necessary. The shortened seat rails still allow the passenger seat to be moved a fair bit back & forth, so when turned and move toward the back of the van, it allows the seat to be reclined more without fouling the dashboard. Overall it worked great.

If you had a seat without rails like mine, then you could simply use more unistrut to make some, then bolt the seats to 2 rows of unstrut oriented front to back, then lay these across the 2 L-R sections on the floor, and bolt together.

This stuff is WAY stronger than the van floor, so no need to worry if its up to the job - it is.

I realise its tricky to visualise my ramblings, so hope I've explained it ok. Places like CEF (City Electrical Factors) sell the stuff. If you want to see what the stuff looks like then there's an interweb site for them unistrut dot co dot uk.

Hope this helps!
 
Last edited:
In case this helps....

I just fitted new 9well different seats into my LDV Convoy. The passenger seat was a bench seat, and like you the gap from driving to clambering into the living space was narrow, and the bench seat made the living space feel more cramped.

I wanted a pair of swivel captains seats. I took a gamble when i found a nearby pair of middle seats out of a Mitsubishi Delica people carrier thing on eBay, bid on them and won the pair for £72.

I was able to graft the base of the LDV seat onto the Delica seat using some 3mm galv plate and a few bolts. It was the passenger seat that was the problem, as the rails the seat came on didn't line up with any of the existing mounting points on the floor.

How I got around it was by using stuff called 'Unistrut'. This is stuff used by industrial electricians and so on to mount heavy electrical panels on walls, or to fabricate free-standing frames. Think of it as grown-up Meccano!

The unistrut is like box-section, but with one side slotted - so from the end it looks like a 'U' (only there is an internal 'lip' at the top of each upright).

I drilled the Unistrut at the base of the 'U' so that it could be bolted L-R across the van onto the existing F & R original seat floor bolt points in 2 rows (F & R mounting points). This meant that the rails on the seat I bought could be shortened to suit, and (as the rails run F-R) could be laid on top of the unistrut.

You can get al sorts of inserts that go into unistrut to enable things to be bolted to it. So I slotted in some M10 threaded inserts, and then bolted the seat rails to the Unistrut.

The good thing about unistrut is that of course it does not fix you to bolting at a specific point along its length, so in effect it is infinitely adjustable along its length for mounting things. So I was able to mount the seat just right (L -R) , so it could swivel 360 deg without clouting the passenger door etc. but without taking up any more of the centre space I wanted than necessary. The shortened seat rails still allow the passenger seat to be moved a fair bit back & forth, so when turned and move toward the back of the van, it allows the seat to be reclined more without fouling the dashboard. Overall it worked great.

If you had a seat without rails like mine, then you could simply use more unistrut to make some, then bolt the seats to 2 rows of unstrut oriented front to back, then lay these across the 2 L-R sections on the floor, and bolt together.

This stuff is WAY stronger than the van floor, so no need to worry if its up to the job - it is.

I realise its tricky to visualise my ramblings, so hope I've explained it ok. Places like CEF (City Electrical Factors) sell the stuff. If you want to see what the stuff looks like then there's an interweb site for them unistrut dot co dot uk.

Hope this helps!


Thanks v much, this unistrut stuff sounds just the job, I'll definitely have a look at it.
 
Seat mounting 2

WVW,

Well it might help as it can give you the option of mounting a wider range of seats maybe - so if you can't find a single tranny passenger seat, then something else may be persuaded to fit.

As someone else said, a drivers seats can take a hammering. As mine came out of the back (well middle) of a people carrier, I think they've had a fair bit less wear & they still feel supportive, the foldable armrests and squab needed a session with some upholstery cleaner, but for what I paid for the 2 I'm well happy.

If you aren't after a swivel 'captains' seat then you could probably get something for not a lot of wedge by trawling the usual web places. When I was looking (I set up a keyword search and got email alerts), eBay had lots of non-swivel seats stripped out of minibuses (guessing bought for conversion and so all the seats became surplus) for typically £25 each (plus lots of P&P, so local much better!) - maybe something like that might do you? Sorry, but I have no idea how tranny seats mount to be more specific.

I took a gamble that I'd find a way to get the seats I bought to fit, and this unistrut stuff made it pretty straightforward without having to drill new holes and reinforce them, get bits welded etc. etc. I'd guess that any seat that has a base you can bolt to could probably be fitted with some of this stuff, a bit of head-scratching, a vice, drill, tape measure, hacksaw and a few cups of tea.

I was lucky in that I could bolt 2 runs of Unistrut L-R across some of the floor mounting threaded holes, which then lined up with the original adjustable seat rail welded tabs (for bolting the Mitsubishi seats into the original donor vehicle), so minimum faffing required, and (after the initial think & measure) the actual work to get my new seat installed took maybe 2 hours on my own.

As an aside - my 'new' seats had seat-belt receivers on the seat itself, and these used a different plug-in than my LDV ones. However (& its worth asking if you get a similar thing) if the seller has the original seat belt inertia reel unit(s) to go with the seat(s). I asked and the seller had the belts, and had no use for them, so he agreed that if I won the auction he'd throw them in with the seats, gratis. By installing the Mitsubishi inertia reel belts on the door pillars (pretty easy, bolted them on in the same way the LDV ones came off give or take a few washers), I was able to use the belt receivers on the seats, and get rid of the long, stalky, floor-mounted LDV belt receivers. Neater & less to trip over!

I've got it in mind to take some pics of 'Sully', then work out how to post them on here at some point (not that Sully is exactly photogenic mind!). If (when) I get around to it I'll try and get a shot of the passenger seat base mounting - a picture paints a thousand words and all that.

I've got the LDV Drivers seat (sans fore & aft rail base as its on my 'new seat') which (while not a sumptuous perch) is at least complete and no holes, tears etc. that you can have if you want it, as I have no need of it or its passenger bench sibling - they are just sitting here awaiting their doom. Doubt if its what you'd really want though, and as I'm in darkest Wales prob too much hassle.
 
Last edited:
Here's the seat mount pic

Hi WVW. I pulled my finger out after work and took some pics of Sully the Van, and the Unistrut seat mounting solution......

Unistrut Seat Mt 3.JPG

The Unistrut lays L-R across the floor in 2 rows - one for the front mounts and one for the rear. I drilled it to match some of the pre-tapped and reinforced seat mount holes (note that there is probably some ones not currently used, to allow for different configurations of seating and the single/bench option, so you may be able to use ones not used now it they line up where you want 'em). I actually put mine across 3 bolt points (the 2 bench seat ones and the centre one for when a single seat is bolted in ) for extra strength. As the floor is corrugated (well, not flat) then where the bolts go into the floor I've packed under the unistrut with corner unistrut 90 deg corner brackets and washers so when tightened up I didn't crush the raised bits of the floor pan.

The longer strut length also means the unistrut is longer, so I could choose to move the seat over a wider range side-to side. If I move it all the way close to the door and turn the seat to face the door then recline it, I can get a continuous 'bed' across the driver and passenger seats. A child (or little adult) could sleep there I reckon. Ok, I don't need that, but its still cool that the adjustability is there. Where it is now it'll rotate 360 deg.

Unistrut Seat Mt 2.JPG

This should show the end view of the unistrut. If you can make out a spring, then that has a threaded piece on top that is rested with gentle pressure against the inner lips of the strut - you move this where it suits you (I of course needed them to line up with the bolt-eyes on the seat rails) then simply bolt up tight (this clamps the piece with the spring under it tight against the lip and makes the whole thing solid). And that's it.

If you couldn't get the unistrut to line up perfectly then you can use brackets / angle iron / more unistrut to come up with a solution. Pretty much bolt down this stuff anywhere, then you can bolt something to it (even using more unistrut if you have a seat but no rails - the only thing you have to look out for is that you want the seat to end up at a sensible height, so a bit of measuring and offering it up is a good idea before attacking with gusto.

I'm sure there are more elegant solutions, but this is a pretty cheap, easily sourced and sorta universal solution I think. I don't know if anyone else has used the stuff for this, its just an idea I had.
 
Hi WVW. I pulled my finger out after work and took some pics of Sully the Van, and the Unistrut seat mounting solution......

View attachment 11208

The Unistrut lays L-R across the floor in 2 rows - one for the front mounts and one for the rear. I drilled it to match some of the pre-tapped and reinforced seat mount holes (note that there is probably some ones not currently used, to allow for different configurations of seating and the single/bench option, so you may be able to use ones not used now it they line up where you want 'em). I actually put mine across 3 bolt points (the 2 bench seat ones and the centre one for when a single seat is bolted in ) for extra strength. As the floor is corrugated (well, not flat) then where the bolts go into the floor I've packed under the unistrut with corner unistrut 90 deg corner brackets and washers so when tightened up I didn't crush the raised bits of the floor pan.

The longer strut length also means the unistrut is longer, so I could choose to move the seat over a wider range side-to side. If I move it all the way close to the door and turn the seat to face the door then recline it, I can get a continuous 'bed' across the driver and passenger seats. A child (or little adult) could sleep there I reckon. Ok, I don't need that, but its still cool that the adjustability is there. Where it is now it'll rotate 360 deg.

View attachment 11209

This should show the end view of the unistrut. If you can make out a spring, then that has a threaded piece on top that is rested with gentle pressure against the inner lips of the strut - you move this where it suits you (I of course needed them to line up with the bolt-eyes on the seat rails) then simply bolt up tight (this clamps the piece with the spring under it tight against the lip and makes the whole thing solid). And that's it.

If you couldn't get the unistrut to line up perfectly then you can use brackets / angle iron / more unistrut to come up with a solution. Pretty much bolt down this stuff anywhere, then you can bolt something to it (even using more unistrut if you have a seat but no rails - the only thing you have to look out for is that you want the seat to end up at a sensible height, so a bit of measuring and offering it up is a good idea before attacking with gusto.

I'm sure there are more elegant solutions, but this is a pretty cheap, easily sourced and sorta universal solution I think. I don't know if anyone else has used the stuff for this, its just an idea I had.


Thanks v much, I see what you mean now, I couldn't figure out how you'd done it. A picture paints a thousand words.

Has it passed MOT ok with the unistrut seating?
 
MoT with Unistrut under seat...

Has it passed MOT ok with the unistrut seating?

No it hasn't as Sully had a new MoT when purchased in November.

The sister firm to where I work though does MoT' s so I know the Tester and he's a decent guy. I told him what I'd done, and his opinion (not seen it yet though) was that as the assembly was bolted to the original braced/reinforced floor as the original seat was, that he could see no reason why he should fail it. Also the seat belts are all on the correct pillar points as before of course.

He did say that he'd seen some where new holes had just been drilled through the floor pan for seats and weren't reinforced and he WOULD fail something like that. He said he'd been involved fitting extra seats & belts in minibuses, and you had to drill so they all went through a boxed reinforced section or they'd not pass inspection.

The original bench seat had 2 bolts as hinges on the front of the mounting tubes, and the rear just had latches with springs on a bit of bent metal that clipped into metal loops that were then bolted to plates on the floor at the back. Not exactly super-duper and thats the original set-up.

The unistrut has got to be 10x stronger than the original rear mount IMO, and it bolts to the reinforced parts of the floor so hopefully there's no issue - and although his comments support that, I don't have a 100% on it.

I wouldn't be surprised that, if I didn't mention it to a tester, that they'd notice the seat fixing - there's nothing to indicate its there from underneath as its the original bolt-holes, and it doesn't look flimsy inside. Thats just a guess though!

When I get the chance though, I will run Sully into work and get his professional opinion as soon as possible, so that I can be certain. I'll let you know when I do that what the outcome is.
 
Seat Mount.... MOT Update

I managed to get hold of my MoT Tester colleague for a 2 mins just now and showed him the pics of my passenger seat mounting arrangement.

What he said was.....

1. The drivers seat HAS to be both secure and have adjustability, or its a Fail (I kept the original base no no probs there).

2. The passenger seat has to be secure (he reckons the unistrut is secure, and as long as that is secure to the vehicle no problem).

Interesting points he raised though....

3. If (like mine have), the new seats have on-board seatbelt receivers in use, then any rust holes in the floor or chassis underneath, whatever within 30cm of the seat mountings will cause a fail, as the seat itself is treated as a belt mounting point.

This 30cm thing doesn't apply to the floor around the seat if the belt receiver mounts elsewhere, but of course the rule still applies, just in a different part of the vehicle, but the area around the belt receiver mounting point instead.

(On the LDV, the stalky OE belt receivers are close to the seat mounts anyway, so makes little difference in my case I think. But if you had say a rusty footwell, then the seat would be closer to that than a normal belt receiver would be, and so would be inside the 30cm radius and cause a fail).

4. Rusty Sills often don't always mean Fail, but again, if the Sill corrosion is within 30cm of a mounting point, then it does.

From his helpful inputs (Thanks Bob!) basically it would seem that a rusty cab floor is going to cause you an MoT fail pretty much regardless, as chances are it'll be within a foot of one of the belt mount points, but a seat with a belt receiver on maybe moves the safe area to a more central floor spot, where it might change what's a pass and what's a fail due to geography!

Other than that, it seems there's nothing prohibiting using unistrut as the interface between the van and the seat :banana:

The key word being repeated is 'Secure' it seems :rulez:
 
Last edited:
I managed to get hold of my MoT Tester colleague for a 2 mins just now and showed him the pics of my passenger seat mounting arrangement.

What he said was.....

1. The drivers seat HAS to be both secure and have adjustability, or its a Fail (I kept the original base no no probs there).

2. The passenger seat has to be secure (he reckons the unistrut is secure, and as long as that is secure to the vehicle no problem).

Interesting points he raised though....

3. If (like mine have), the new seats have on-board seatbelt receivers in use, then any rust holes in the floor or chassis underneath, whatever within 30cm of the seat mountings will cause a fail, as the seat itself is treated as a belt mounting point.

This 30cm thing doesn't apply to the floor around the seat if the belt receiver mounts elsewhere, but of course the rule still applies, just in a different part of the vehicle, but the area around the belt receiver mounting point instead.

(On the LDV, the stalky OE belt receivers are close to the seat mounts anyway, so makes little difference in my case I think. But if you had say a rusty footwell, then the seat would be closer to that than a normal belt receiver would be, and so would be inside the 30cm radius and cause a fail).

4. Rusty Sills often don't always mean Fail, but again, if the Sill corrosion is within 30cm of a mounting point, then it does.

From his helpful inputs (Thanks Bob!) basically it would seem that a rusty cab floor is going to cause you an MoT fail pretty much regardless, as chances are it'll be within a foot of one of the belt mount points, but a seat with a belt receiver on maybe moves the safe area to a more central floor spot, where it might change what's a pass and what's a fail due to geography!

Other than that, it seems there's nothing prohibiting using unistrut as the interface between the van and the seat :banana:

The key word being repeated is 'Secure' it seems :rulez:

Thanks very much for all this really useful and interesting info. A thread worth printing out :cheers:

I think before I do anything I need to remove all carpets and do a thorough inspection and take photos of the floor and standard fittings etc !
 
get the carpet up!!

I think before I do anything I need to remove all carpets and do a thorough inspection and take photos of the floor and standard fittings etc !

Yes, I removed the flooring as it was wet anyway so I wanted to 'do' the floor. But anyway it makes it far simpler to work out what you (there's likely some unused threaded fixing points under there) and see what you can do / use.

When I fixed the unistrut to the floor I tried the seat fitted to make sure it was all ok where I wanted it. Its 2 min to take it in and out now as there are 4 easily accessible bolts holding it to the unistrut. So... I took the seat out again, then put the flooring back in place in the footwell, and laid it over the Unistrut left bolted in. Then, I could carefully cut using a Stanley to get the flooring to sit down around the Unistrut as neatly as possible.

Then I just plonked the seat back in place , and put the 4 bolts back in and tightened them up.
 

Users who viewed this discussion (Total:0)

Back
Top