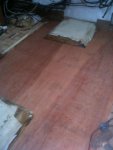
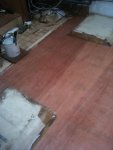
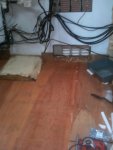
hymer floor

from one mercedes hymer 750s owner to another good luck with your restoration ::drive:
 
thats a very nice camper you have there bertie, good work on the floor a tip if you think you need it but looks like you got it in hand, but with my walls i skinned them like your floor but used polyurethane wood glue on the polystyrene to hold it against both bits of Bord,also to take up any voids that can harber water , you can get the clue from toolstation cheaper than from a wood yard supplier of boat yard .
your doing a very good job well cool bus love it. i want one lol
 
Respect, that is quite a task.

If I ever have to put a new floor in a MH I am going to use this water proof flooring.
Have not seen it in the UK anywhere, real shame as it's hard wearing and durable.
Called "Siebdruckplatte"

Siebdruckplatten---Die-ideale-Platte-fuer-Anhaenger-oder-LKW-Boeden_571.aspx

Siebdruckplatten - Die ideale Platte für Anhänger oder LKW-Böden - Holzhandel Köln Leverkusen
 
thats a very nice camper you have there bertie, good work on the floor a tip if you think you need it but looks like you got it in hand, but with my walls i skinned them like your floor but used polyurethane wood glue on the polystyrene to hold it against both bits of Bord,also to take up any voids that can harber water , you can get the clue from toolstation cheaper than from a wood yard supplier of boat yard .
your doing a very good job well cool bus love it. i want one lol

Thanks for that shaun the polystyrene is glued down but just not
to the top skin that I'm putting on I thought this might be to allow
for movement of any kind all the bottom skin of the floor is fine and solid
there were just a couple of cross sections that I have strengthened in places
or replace which was easy enough I have cut another 8x4 sheet all ready to
go in and prepared the floor but the dreaded rain turned up again so I had to stop
I will be putting more pictures up soon as I'm only doing up to the step where
the u shaped lounge is as this will cover the hole up where the fire went so thanks
any information from anyone is greatly accepted as I need all the ideas I can get
 
you know my email if i can help let me know i will keep a look out now for your progress, keep the pics up i lovem lol..
 
yup raing here as well , i was going to fit some side lights but cant now.
 
here are more pictures so far what ive done
Picture 205.jpgPicture 201.jpgPicture 193.jpgPicture 203.jpgPicture 194.jpgPicture 199.jpg
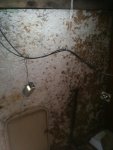
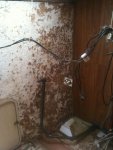
as you can see its getting there where the paint tin on the floor is where the fire was also on the dark wood wall where there is a lighter piece added this was done before i had it so it needs changing as most of the bathroom walls were the same with bits added
 
Last edited by a moderator:
blimey thats a lot of work to do good for you on the flore im likeing this so whats the dead line date then ?
 
blimey thats a lot of work to do good for you on the flore im likeing this so whats the dead line date then ?

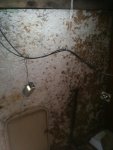
i havent a clue yet shaun as before i took out the bathroom as you acn see where the white wall is i never expected to do that as that wall you can see i have scrapped all the board off it it just had a piece of thin ply board pushed in place with a couple of screws in then the shower and sink holding it in place when i took it out it was wet behind there it was only the result of the roof leaking in from where the aluminium chequer plate was screwed on to the roof i have repaired the roof first but the wall would not dry out with everything in so thats another job so when i put all new walls back i still want like the rounded corners like you can see on the edge of the one in this picture you can see where the piece of board has been added not a very good job if you ask me but the floor is the easy partas i am only going up to the step where the u shaped lounge is
Picture 202.jpg


Picture 194.jpgPicture 196.jpg
these are the pictures of where the bathroom goes
 
Last edited by a moderator:
i can see why you cant make copdoc show! so looking at the pics is the wood by the locker hatch side , is that laminate floor on the wall?
 
i can see why you cant make copdoc show! so looking at the pics is the wood by the locker hatch side , is that laminate floor on the wall

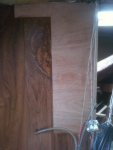
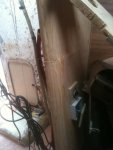
if you mean the dark wood that is the proper wallboard the man who had it before me painted the walls with paint and grain the shower goes right up to that wallboard that sticks out the white wall that i have scrapped where you can see the square hatch is where the sink sits the hatch door is where you take the toilet out its just a portapotty thing up till now but the walls are ready for the boards to go on now when i get them but the other pictures if you look on picture 6 that is the wall with a piece cut out of it and another board cut to fit in the part that he cut out he just did it to bypass putting new walls in
 
Last edited by a moderator:
i know ipswich plastics do the wood you need and it works out a around 27 puonds a sheet, the more you get the cheaper it is, its around 3 half mm thick and is water proof well the glue is, they do deliver but im doubtful they deliver were you are sadly but the point of telling you is if you ring them they may tell you were they get it from so you can chase up your own supply, pity realy as i also have a electric dehumidifier here , that would help you im sure.
i do see what you mean about the wood that is grafted in to the wall, bit mesy .. but your doing a craking job..
 
was thinking if a sheet of Formica wood effect may help the wall thats cosmetically challenged, if your thinking of leaving what the old owner has left you. just thinking out aloud.
 
was thinking if a sheet of Formica wood effect may help the wall thats cosmetically challenged, if your thinking of leaving what the old owner has left you. just thinking out aloud.

No shaun I'm not the one to do that I was flabagasted at the sight of what he did
as I was taking it out so I just have to put the Walls back properly how they should be
I mean two of the Walls I took out that surround the bathroom were half of the original
wall and half of a completley different board they were stapled together and filled over with
wood filler so I think that is the only bit of wall left in with the least bit cut out of it and filled
in with a different board but the worst part about it is if I take that bit of board out now it's
two boards stuck together to make the same thickness as that is how the rest were
 
i take it there is no strength in it at all then, would be beter to put new in plase any way . it was just a thourt.
 

Users who viewed this discussion (Total:0)

Back
Top