Skylight insulation problem

daisymini

Full Member
Posts
889
Likes
990
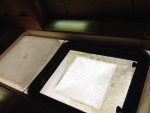
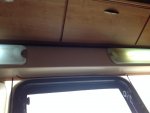
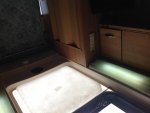
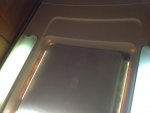
IMG_0071.jpg IMG_0072.jpg IMG_0073.jpg IMG_0074.jpg

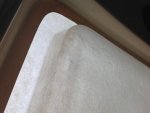
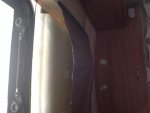
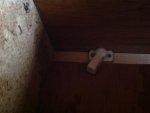
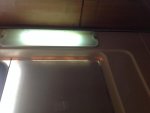
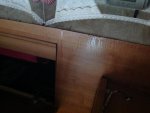
As can be seen from the pics I have a skylight that runs whole length of van near enough. I've tried sticking silver insulation up but to no avail ( won't stick) I was thinking of sticking silver insulation to 3 ml ply then wedging gaps with insulation wool and securing it with the catches shown in last pic...but I don't know what the catches are called and I can't find them in internet anywhere! I need to be able to remove whatever I put up for the summer..

Apart from leaky roof lol this is a major headache in the winter as all my heat goes out the roof and it also rains on the inside with the amount of condensation that drips from ceiling.

Can Any of you clever people out there come up with a better suggestion that allows me to insulate for winter but can be removed for summer?

It seems securing it to the ceiling is problematic in itself.
 
Wickes 50mm General Purpose Polystyrene 1200 x 2400mm | Wickes.co.uk

WICKES 50MM GENERAL PURPOSE POLYSTYRENE 1200 X 2400MM
Product Code: 210824

Polystyrene boards £15.45
Width: 1200 mm
Length: 2400 mm
Coverage: 2.88 m2
Pack Quantity: 1
Thermal Conductivity: 0.038 W/mK
Thickness: 50 mm
Material: Polystyrene
Usage: Masonary Wall
Type: Polystyrene Board
Thermal Resistance R Value: 1.32 m2K/W
Brand Name: Wickes

Very light, cut it with a bread knife, hand wood saw etc
:wave:
 
Thanks guys now I know what I'm looking for regarding catches I may just have to refine the construction idea lol.
 
Turnbuckles are the best way. Have you considered a polycarbonate sheet in the manner of double glazing? where it makes contact with the body use self adhesive foam draught excluder.
 
Wickes 50mm General Purpose Polystyrene 1200 x 2400mm | Wickes.co.uk

WICKES 50MM GENERAL PURPOSE POLYSTYRENE 1200 X 2400MM
Product Code: 210824

Polystyrene boards £15.45
Width: 1200 mm
Length: 2400 mm
Coverage: 2.88 m2
Pack Quantity: 1
Thermal Conductivity: 0.038 W/mK
Thickness: 50 mm
Material: Polystyrene
Usage: Masonary Wall
Type: Polystyrene Board
Thermal Resistance R Value: 1.32 m2K/W
Brand Name: Wickes

Very light, cut it with a bread knife, hand wood saw etc
:wave:

Hi, I'm not sure you can see clearly from pics but both ends have a mounded plastic square shape that comes down leaving not much room either side. Hence I thought it might be easier to stuff the woolly stuff in easier if you know what I mean lol
 
you could just put a line of woodscrews down each side, sticking out 15mm or so and string cheap bungee cords across then stuff old duvets etc behind them
 
Can you fit some plastic angle extrusion to the sides and slot in some polystyrene sheet .Idealy it would need a base bonded to it to give it some firmness and to stop bits falling off, if they were about 18 deep they could slot in and out bazz PS could be a fire risk.
 
Last edited:
Difficult to discern detail from your pics. Anyway here's my try. Perhaps you could consider camping mats fixed as required with Velcro strips. Any void areas that are bridged across can be supported with thin narrow plywood strips bonded to the insulation. Flexible magnetic strips (as on fridge doors) glue fixed to camping mats and the fixing surfaces could be used in lieu of Velcro.
Contact adhesives are probably best, they usually can be removed with a solvent if you change your mind!
 
Can you fit some plastic angle extrusion to the sides and slot in some polystyrene sheet .Idealy it would need a base bonded to it to give it some firmness and to stop bits falling off, if they were about 18 deep they could slot in and out bazz PS could be a fire risk.

Did contemplate this idea but because of the fibreglass mounded ceiling and position of lights this makes it impossible.
 
i think that any insulation needs to be in contact with the plastic to stop condensation.
a surefire method is to screw thin ply across the ceiling in 2 foot sections then stuff insulation in the gap a section at a time
 
IMG_0076.jpgIMG_0077.jpgIMG_0079.jpgIMG_0080.jpgIMG_0081.jpgIMG_0082.jpg

Some more pics to show moulding and problem with lights, the last pic is an example of the condensation
 
i think that any insulation needs to be in contact with the plastic to stop condensation.
a surefire method is to screw thin ply across the ceiling in 2 foot sections then stuff insulation in the gap a section at a time

My thoughts too Nige...

Or just scrap the van......
 
right sue bear with me no with the light the have a screw at each end {correct}undo the lights and insert a small strip of something cominout in the van so you end with the light with two tabs of something sticking out sky.jpgthen could you not slide something like cellatex the blur is your sky light the oblongs are lights with the tabs on the screwa
 
i think that any insulation needs to be in contact with the plastic to stop condensation.
a surefire method is to screw thin ply across the ceiling in 2 foot sections then stuff insulation in the gap a section at a time[/QUOT

You have to make absolutely certain that vapour cannot get from inside the van to condense on the cold roof light surface and then be absorbed by the insulation especially if of glass wool or non closed cell composition, so a vapour barrier needs to be laid on the inner face.

I was going to line the ply with the silver thin insulation stuff as a membrane.
 
I have an idea - possibly a weird one.

Soooo. Can you make yourself a sack-type-thing that is about the same size as the skylight area (out of a water resistant fabric - cheap off eBay) then just stuff it with recycled plastic bottle insulation (like fibreglass insulation but not itchy and won't rot or burn).

You could fit press studs along the edges to hold it in place. You can get sets of normal female studs & screw-in male studs for wall fixing.

NB - I tried writing the last paragraph with no double entendre but it was impossible.
 

Users who viewed this discussion (Total:0)

Back
Top